In today’s increasingly connected digital landscape, safeguarding user accounts from unauthorized access is paramount. This article explores the hands-on implementation of Two-Factor Authentication (2FA) in Spring Boot, offering a comprehensive guide to fortifying your applications and enhancing user security.
Steps for Two-Factor Authentication:
We can create a new spring project from site: start.spring.io
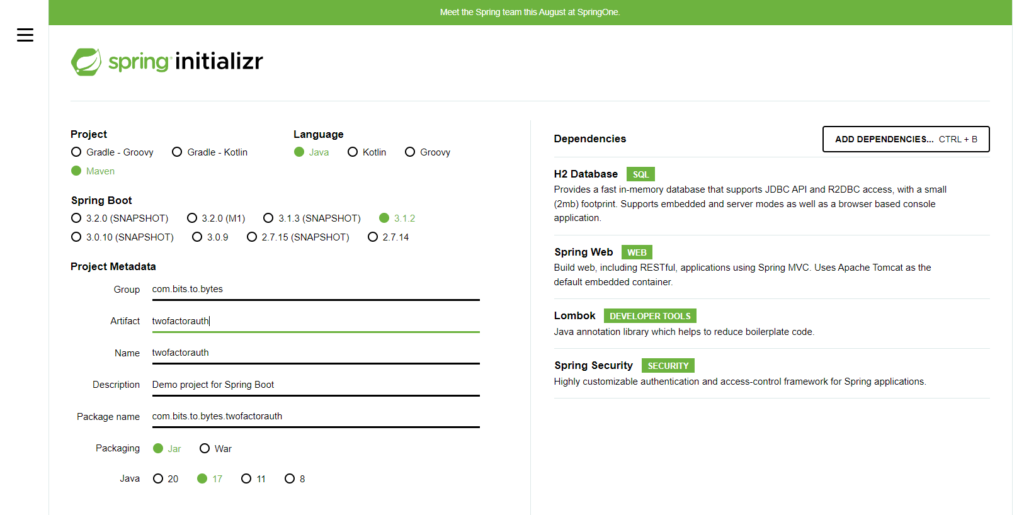
In this project we’ll be using H2 DB.
Config:
Config for connecting to H2 db:
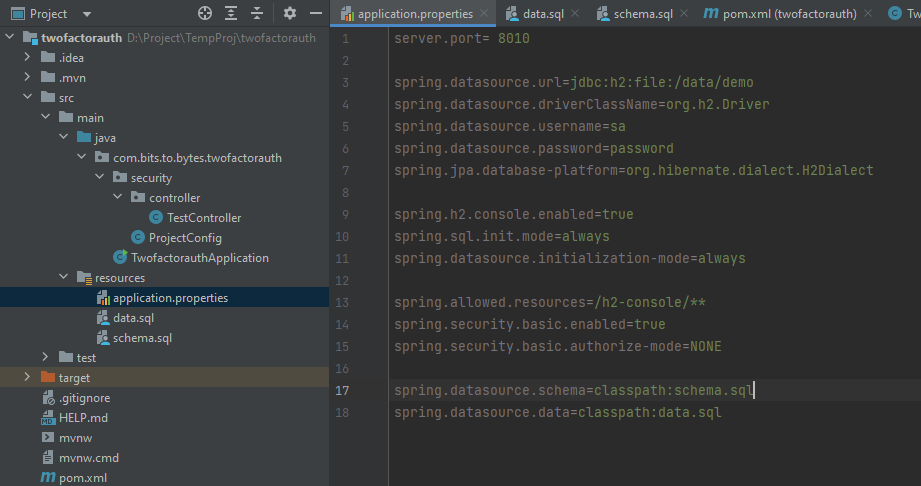
To have a schema setup and data in those schema’s every time we run the application, we’ll create schema.sql nd data.sql files in the resources folder.


H2 CONSOLE:
Lets see if we can connect to h2 from browser and see the schema and data. We’ll hit the h2 url: http://localhost:8010/h2-console
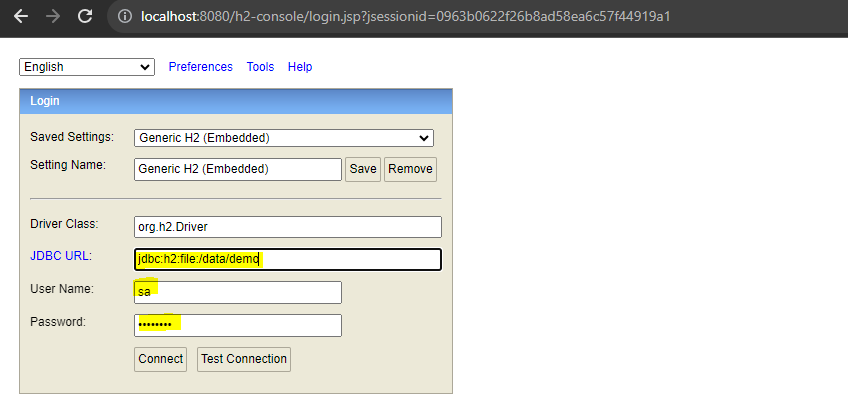
You might be wondering why we didnt see the login page while accessing the h2 DB. This is because we’ve explicitly told Spring to disable security.

We can see that our tables are created .
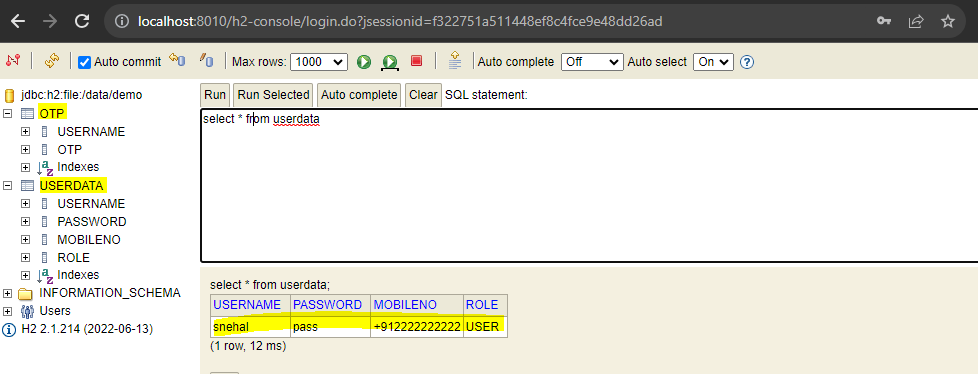
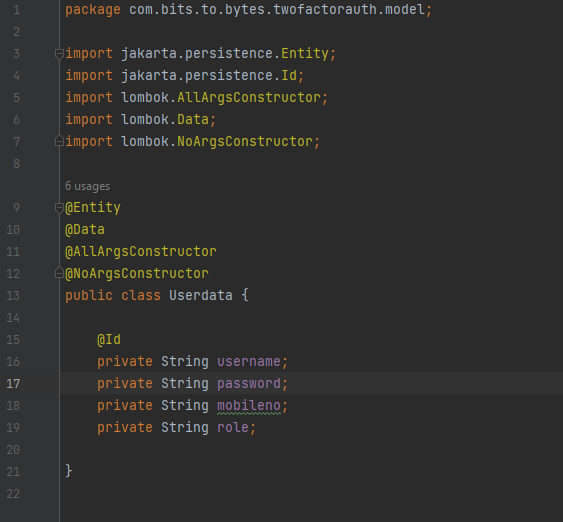
Now lets create entity in our project to map to the UserData table. We will need JPA dependency:

HANDLING USERS
UserData pojo:
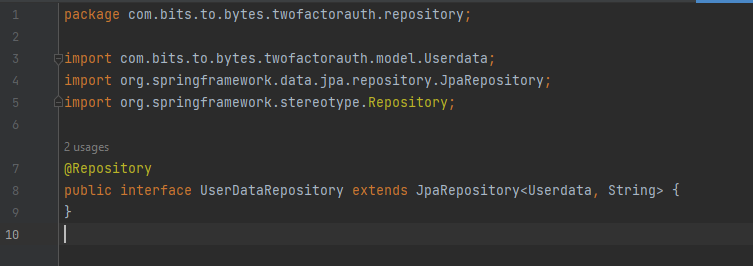
Now lets create Repository for UserData:
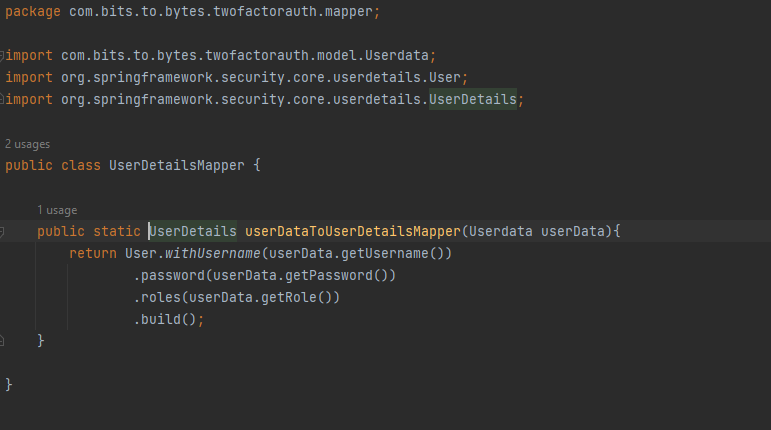
We will need a mapper which will map the UserData Class to UserDetails class so that we can hand the UserDetails Object to UserDetailsService.
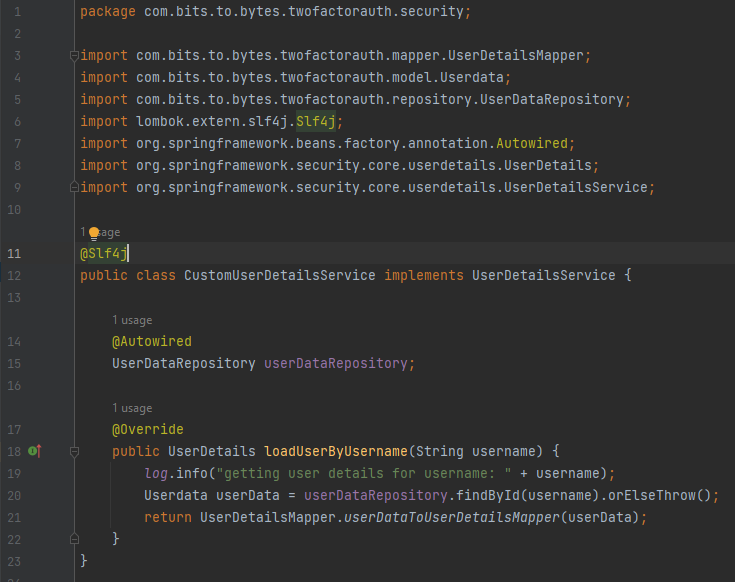
Now we need UserDetailsService class which will fetch the DB with the username whenever a login request comes. If the user is not present or if the password is incorrect, it will throw Bad Credential Exception. Then with the help of mapper, it will convert the UserData object to UserDetails object.
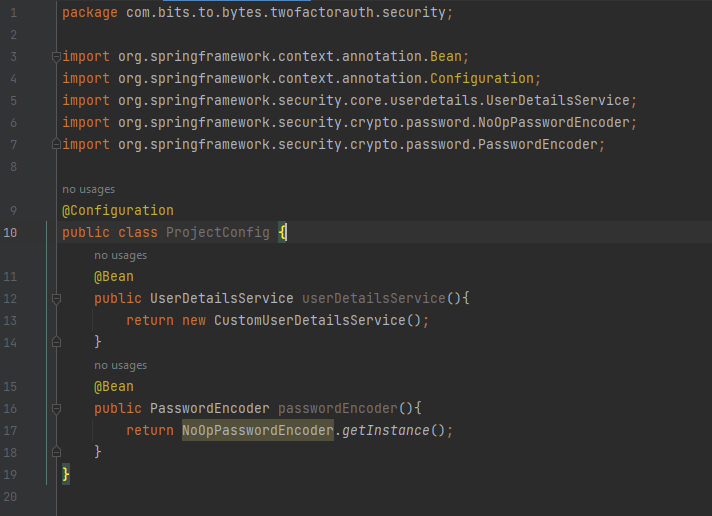
Finally, we’ll create beans for UserDetailsService and PasswordEncoder so that the spring security can use our implementation instead of the default.
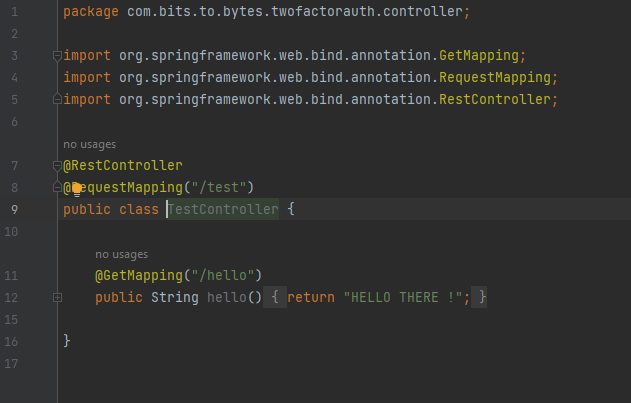
Lets create a controller:
Project Structure:

Now we are all set to test the changes:
TESTING:
Correct credentials:

Incorrect credentials:

2 FACTOR LOGIN CHANGES:
Now lets incorporate 2 factor login logic into the current code.
Lets start with creating Otp pojo, and OtpRepository:
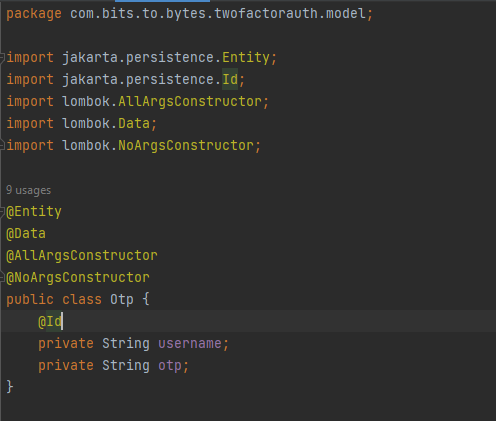
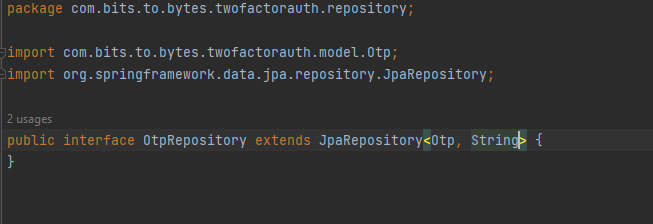
Now lets create Authentication Objects for Otp and credentials so that we can create separate AuthenticationProviders and separate Authentication logic for otp flow and credentials flow:
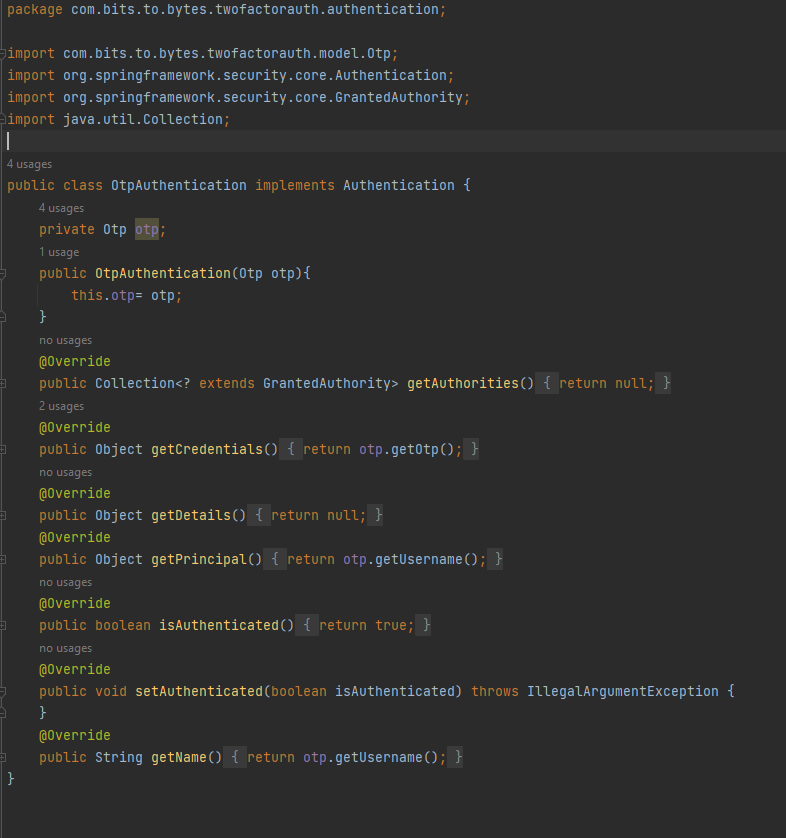
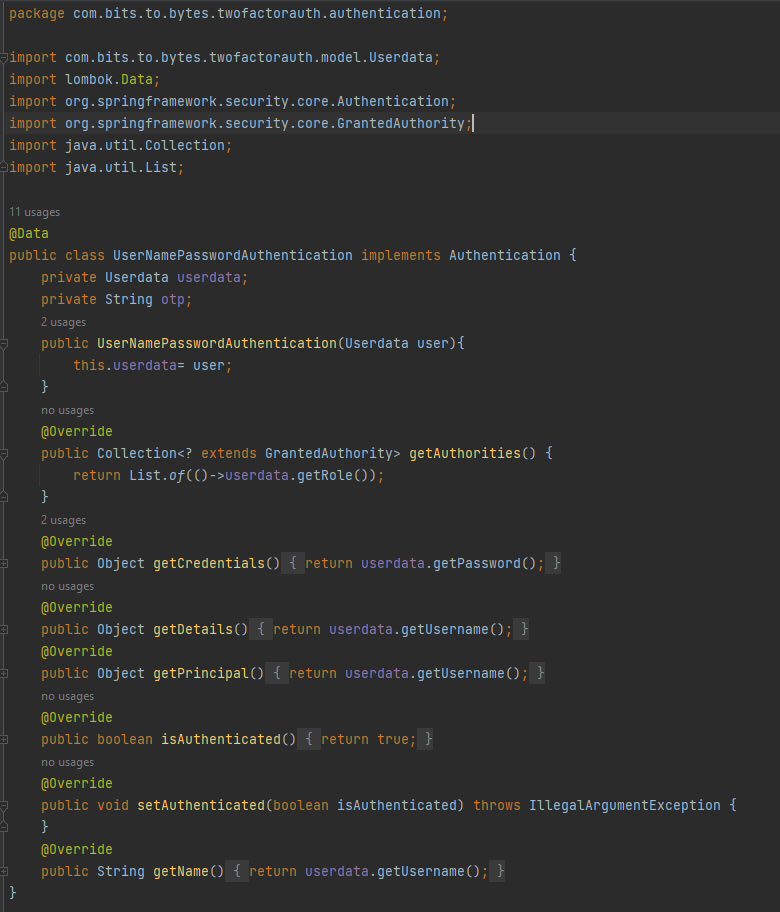
We’ve added otp as String field in usernamePasswordAuthentication so that we can use this otp to provide as header in response if credentials are correct, and the same OTP can be provided to the user to put in the next screen to fully authenticate.
Now lets implement the authentication logic in the AuthneticationProvders for both usernamePassword and otp:
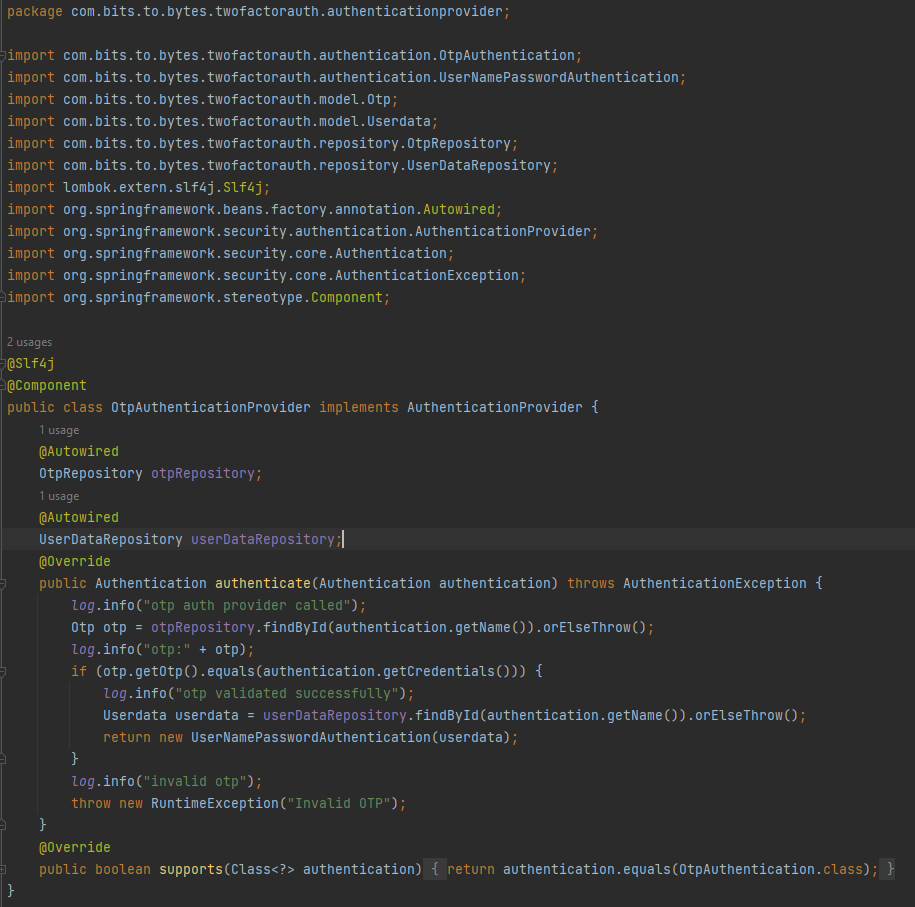
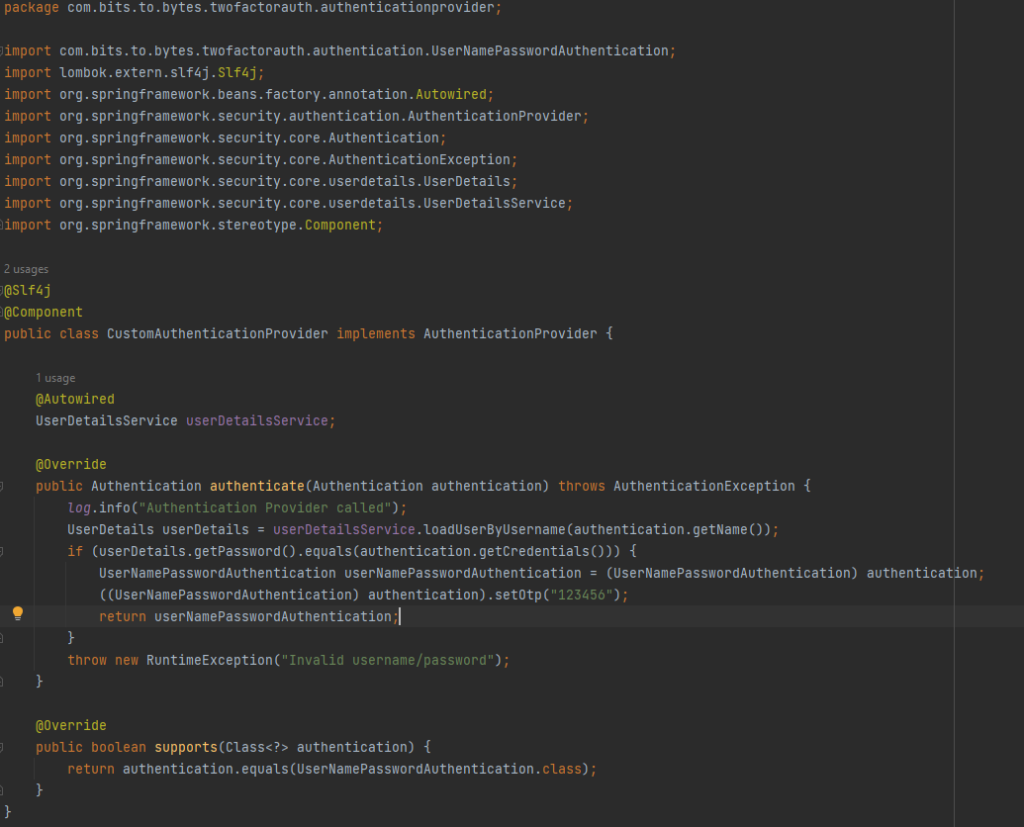
For usernamePasswordAuthentication , we will first load the userDetails from the DB and then match the passwords, if they are valid, then we will set otp in the Authentication object and return back. For otpAuthenticationProvider logic, we will load the Otp details from DB and then match it. If they are matching, we will create Authentication Object by getting the userDetails from DB and returning it back.
Here the supports method will do the magic of calling the appropriate AuthenticationProvider. One supports Otp Authentication whereas the other supports UsernamePassword Authentication
Now since the authentication logic is in place lets add a filter which will help in calling the appropriate Authentication Provider and setting up the Authentication Manager.
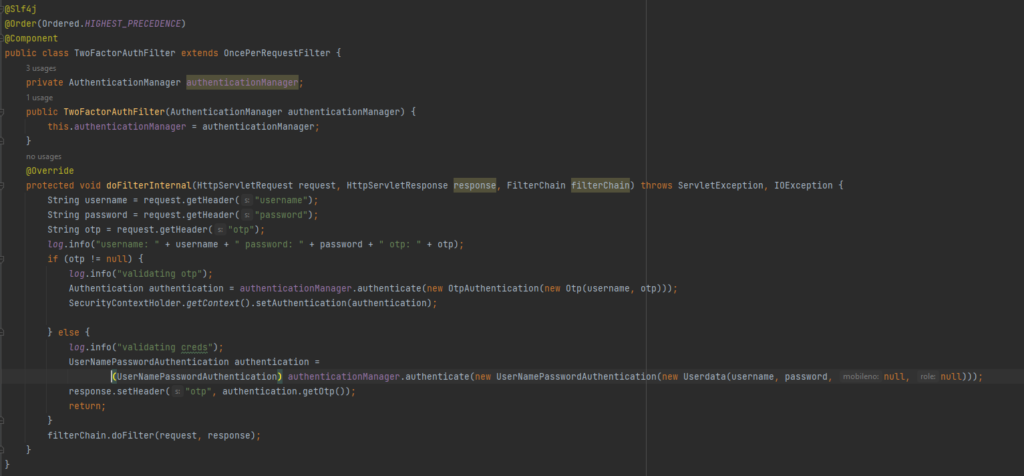
Whenever a request comes the filter will check if the otp is provided, if yes it will create OtpAuthentication Object so that the OtpAuthenticationProvider is called and otp is validated. If otp s valid, the user will be allowed to access the endpoints. If otp is not provided, the filter will create a UsernamePasswordAuthenitcation Object so that the CustomAuthenticationProvider is called and the passwords are matched. If the passwords amtch, the user will be provided with the OTP in reponse and the flow will end there.
Coming to the final part lets define beans in Config.
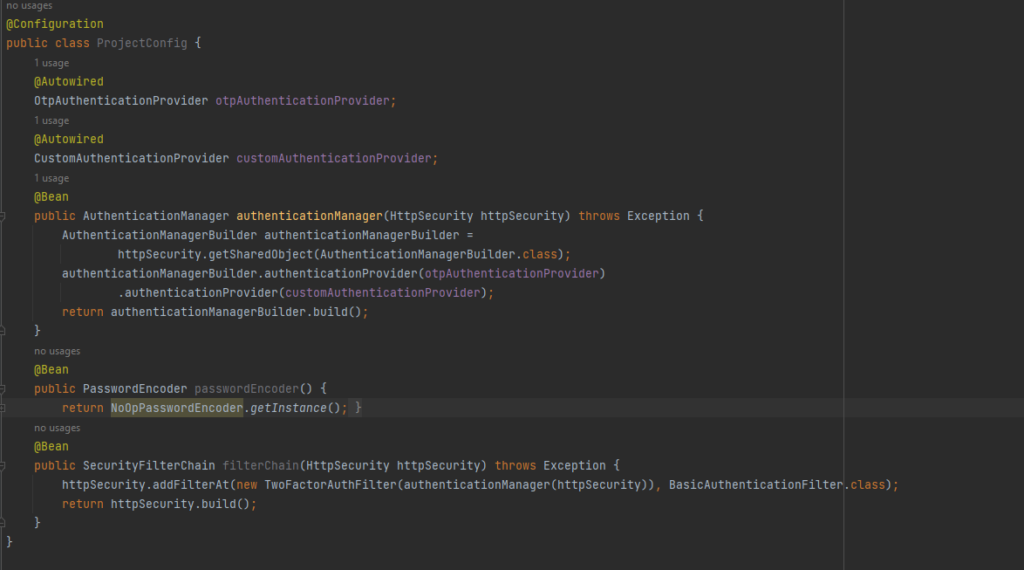
We can see that we have provided the AuthenticationProviders details to AuthenticationManager. And in filterChain, we’ve specified to use our authentication logic instead of BasicAuthentication provided by Spring security.
Project Structure:

Lets test the changes.
Valid usenamePassword:
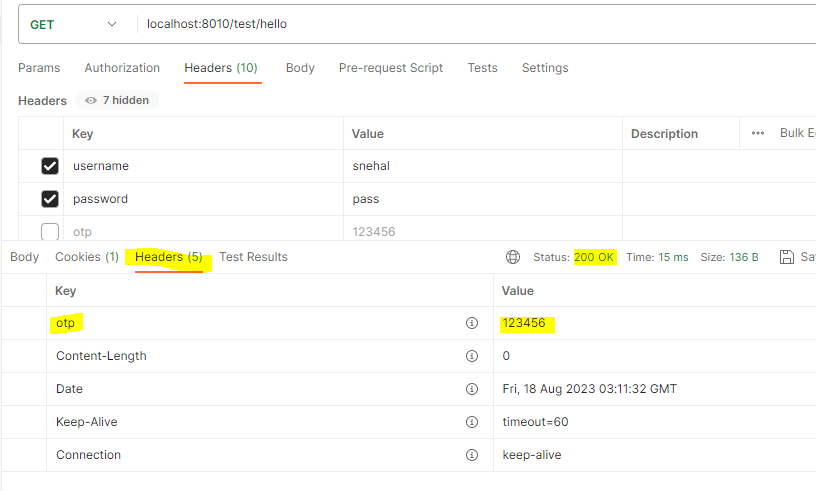
We got Otp in response header. Let’s put this otp in the next request as header:

Otp is validated and we are able to access the site now.