Lets start by creating a spring boot application for Spring security basics from : start.spring.io with the following dependencies:
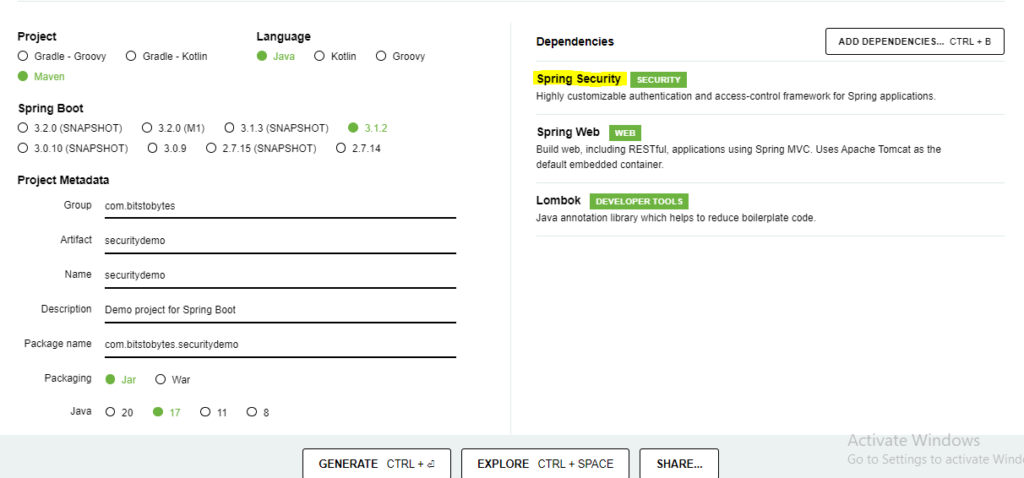
We need to add the Spring Security dependency in the project. By default when we run the project, we will get a default password which will be used to authenticate a user.

Whenever we access the project api’s, we will be redirected to /login page.

After successfully entering the username (‘user’ by default) and password(the one we got in logs when we started the application), we will be redirected to the api endpoint.
SPRING SECURITY ARCHITECTURE
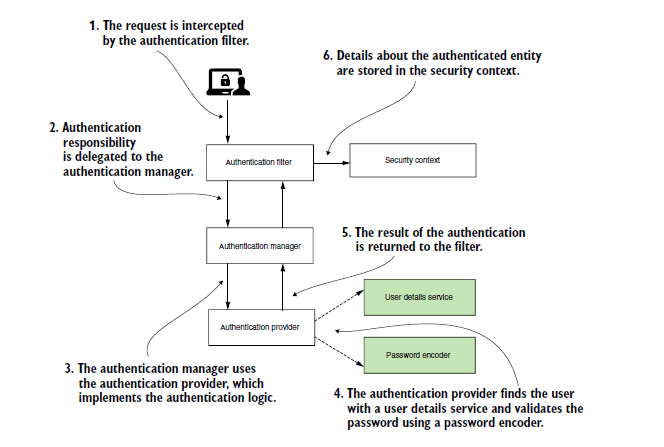
Every request which comes will pass through the Authentication filter. Spring provides BasicAuthenticationFilter which authenticates users based on the credentials. Although, we can have our own custom filters and place them before or after the position of a known filter. This is called filter chaining.
The Authentication filter sends the http request to Authentication Manager. Authentication manager is the one responsible to call the appropriate Authentication Provider.
The Authentication Provider is the one which contains logic for authentication. We can create our own authentication Providers with our own logic to authenticate user by username/password or OTP or any other means.
Password Authenticator is the one which validates the password. The basic Password Authenticator provided by SPring in NoOpsPasswordEncoder. It is depricated one but it has the logic to validate the password as it is without any encryption. We can also create the custom Password Encoder so that it will validate the password based on our own encryption logic.
UserDetailsManager is the one responsible for managing the user details. It depends on UserDetails class which has fields username, password and GrantedAuthorities. The Granted Authorization field is used to Authorize the user for access. The main use of UserDetailsManager is to get the details of user possiby from DB.
USER DETAILS
UserDetails interface has 5 main methods which we need to implement:
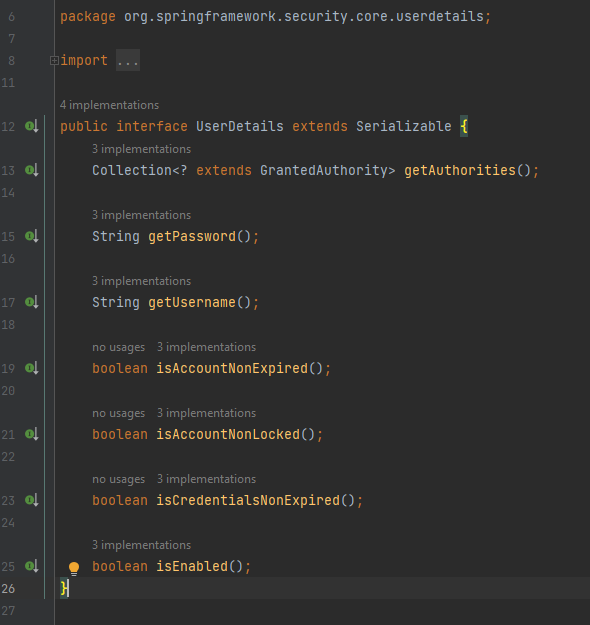
Sample implementation:
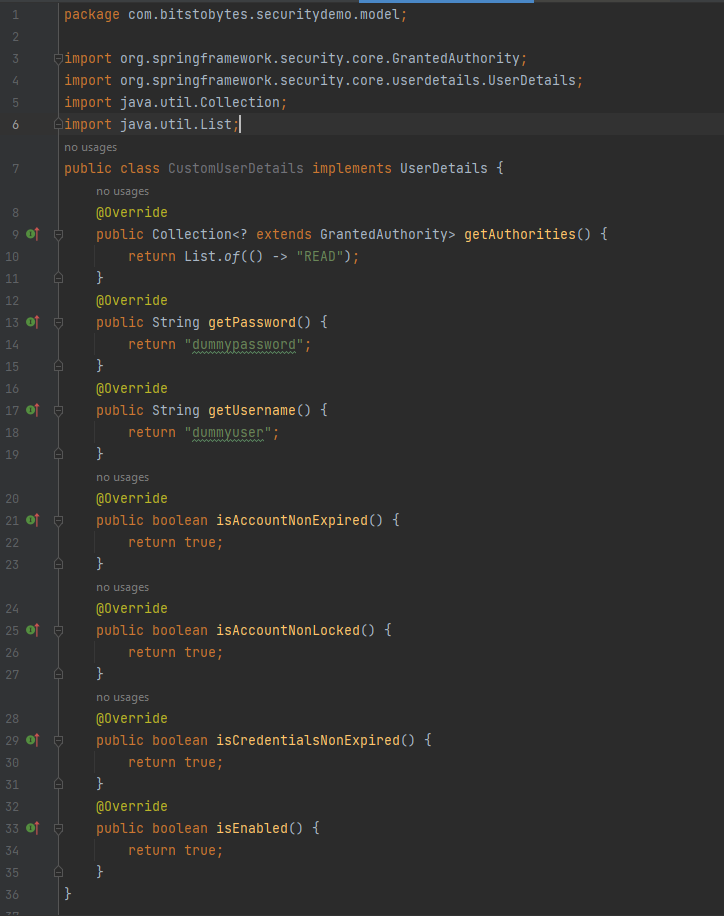
getAuthorities() method is used to get the authorities of the user. Based on the authorities it is decided whether the user can access a particular endpoint or not. Suppose there is a warehouse application, it stores products for the customers to order and products for the admins to sell. There will be 2 endpoints, one will be visible for the users to add the product to the cart and order whereas the user wont be able to access the admin endpoint from where the admins can add the products to sell.
getUsername() and getPassword() methods as the name suggests, are used to get the username and password of the user.
isAccountNonExpired(), isAccountNonLocaked(), isCredentialsNonExpired(), isEnabled() by default we’ve set it to true here. This means the account will be active and enabled forever. However we can set some logic to return false. Eg. after 3 unsuccessful password mismatch while login, we can make isEnabled() return false.
If you dont wish to create a CustomUserClass but still create a user, you can use the User class provided by Spring Security:
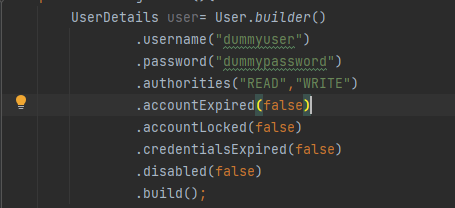
Now we need to provide this CustomUserDetails to UserDetailsService so that it can be used by Spring Security to get details of user. UserDetailsService interface:

Whenever we implement the UserDetailsService interface, we need to implement the method: loadUserByUsername(). Sample implementation:
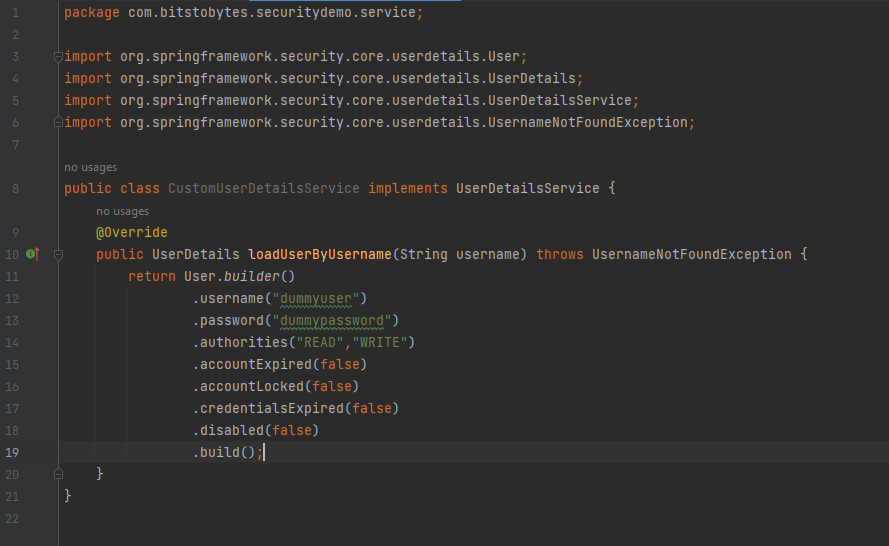
Of course instead of hardcoding the user, we can fetch the User details from DB and then populate the CustomUserDetails and return in the loadUserByUsername(). We will implement this flow in the upcoming tutorials.
We tell Spring security to use our UserDetialsService instead of the default one by creating beans and returning our CustomUserDetails. One thing to note here is that whenever we pass our UserDetailsService, we need to provide definition of PasswordEncoder too. Else, we’ll get following Exception while authentication:

Bean Definition for UserDetailsService and PasswordEncoder:
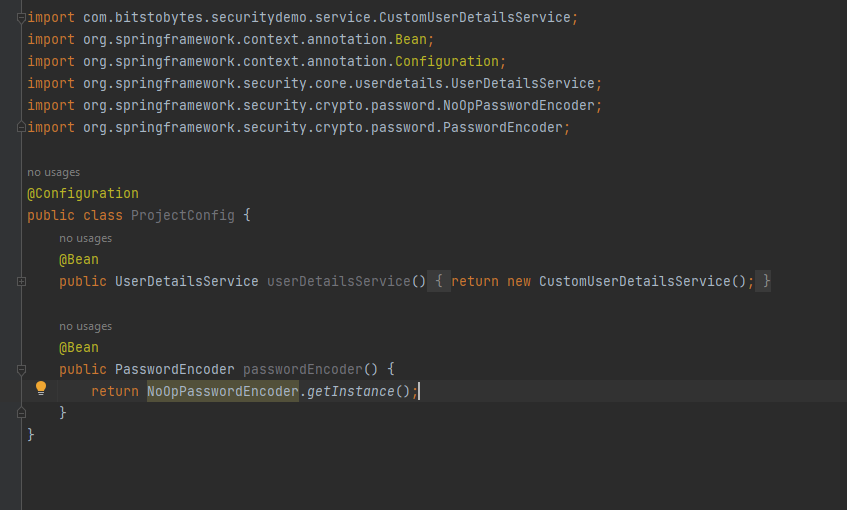
Login with dummyuser and dummypassword:

Successful Login:
PASSWORD ENCODER
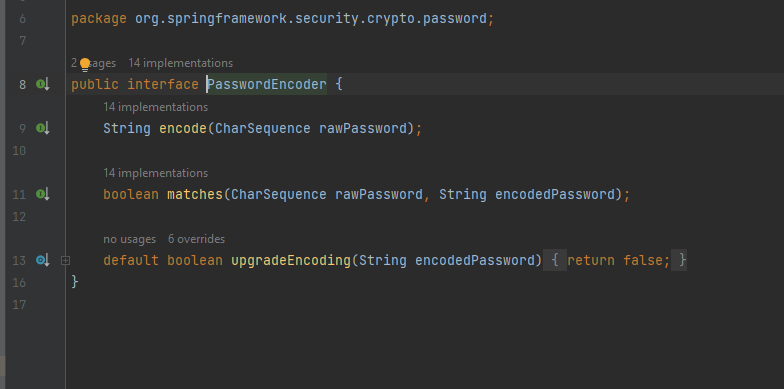
The purpose of encode(Charsequence rawpassword) method is to provide encryption or hash for a given password. matches(CharSequence rawPassword, String encodedPassword) method is used to match the encoded String with a rawPassword. upgradeEncoding(CharSequence encodedPassword) method when overridden to return true will encode the password again for better security.
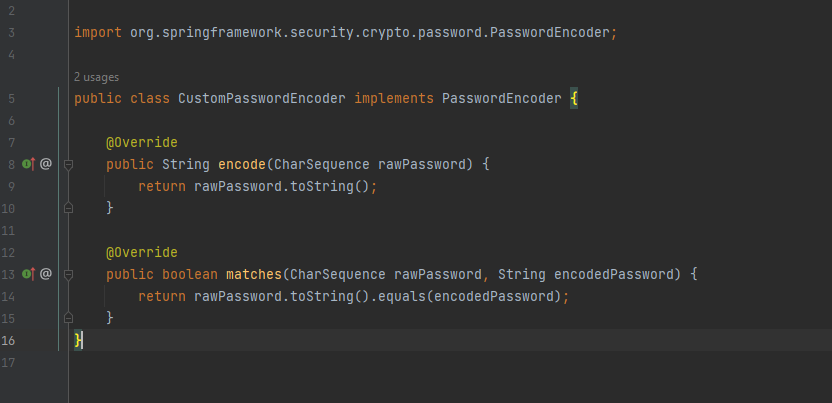
Sample Implementation of Password Encoder w/o encryption:
Sample Implementation of Password Encoder with encryption:
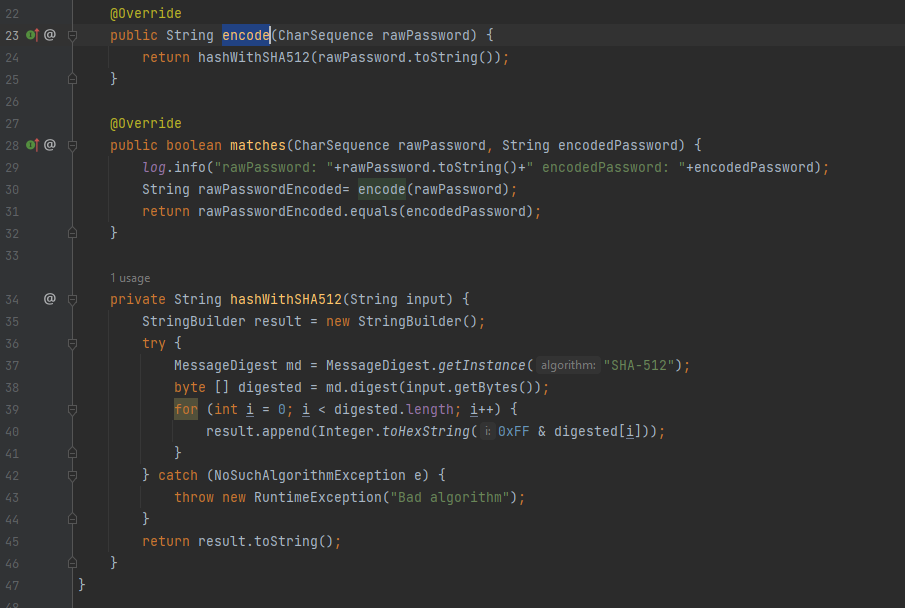
NOTE: remember if we are matching with encrpted password, then while storing too we need to encode and store: .password(passwordEncoder.encode(“dummypassword”))
AUTHENTICATION PROVIDER
The Authentication Provider is where we will find the conditions and instructions that decide whenther to authenticate the request or not. The Authentication interface represents the authentication request event and holds the details of the user.
Authentication Interface :
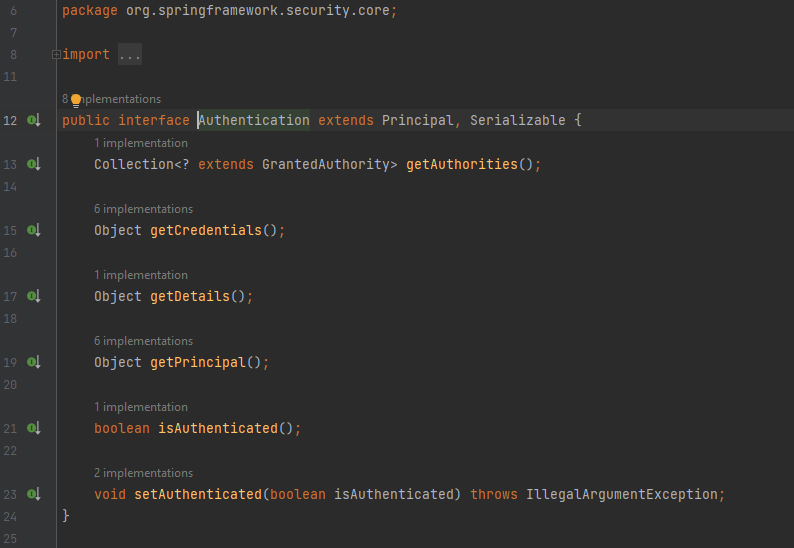
Authentication Provider Interface :

The Authentication Provider’s responsibility is strongly coupled with the Authentication contract. The authenticate() method receives an Authentication object as a parameter and returns an Authentication Object. The supports() method is used to check if the current Authentication Provider support the Authentication Object or not. For eg. Suppose you have 2 factor auth implementation, for a user requesting the access first he will authenticate using username and password so We can have a Authentication Provider which support username and password Authentication and will be called. Next, after successfully inserting the credentials, the user will be asked to enter otp, so we can have a Authentication Provider which can support username and OTP.