In this tutorial, we will guide you through the practical steps to create a Spring Boot application that serves as a mail server, allowing you to send emails through Gmail. This can be particularly useful for applications that require email notification functionalities.
GMAIL CONFIGURATIONS:
We would have to create app password in our Gmail account. For that login to your mail account, go to account settings and enable 2-step verification.
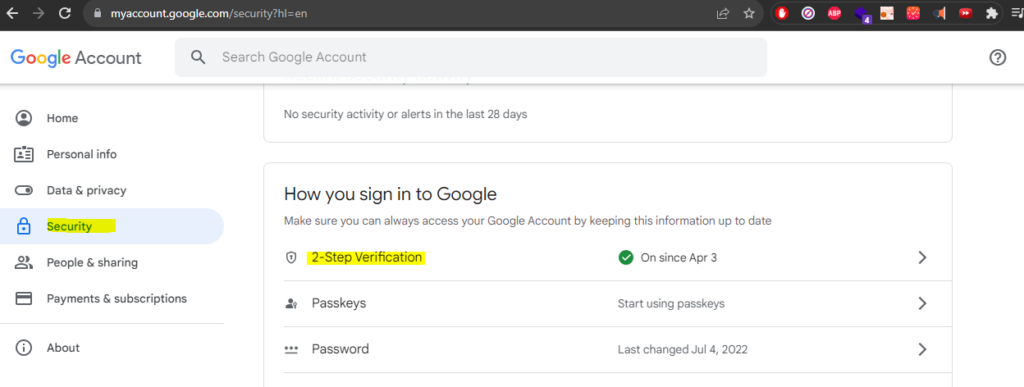
On the same page in bottom there will be option to create app password.
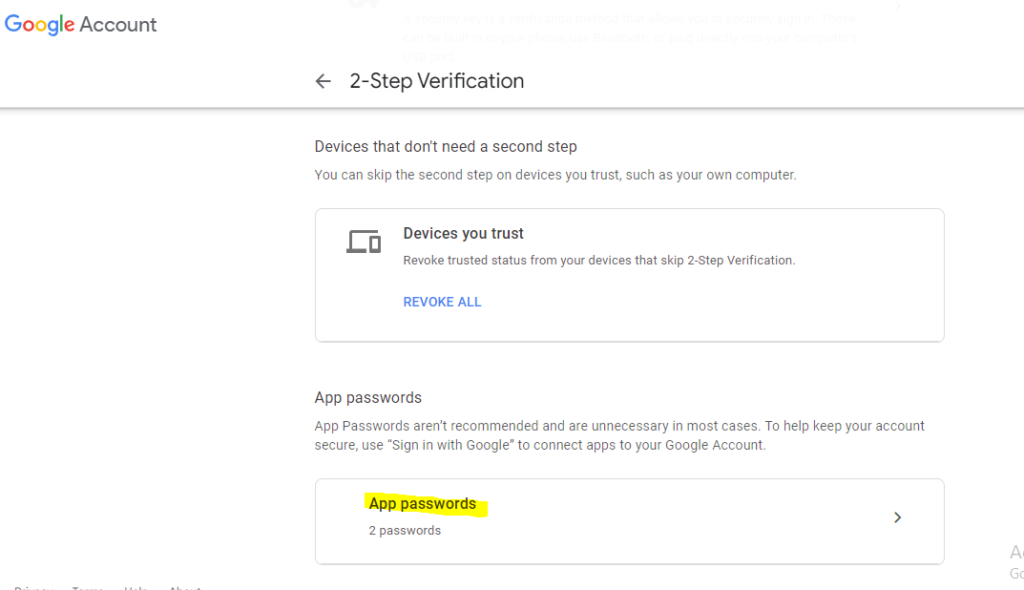
Click and create a new app password.
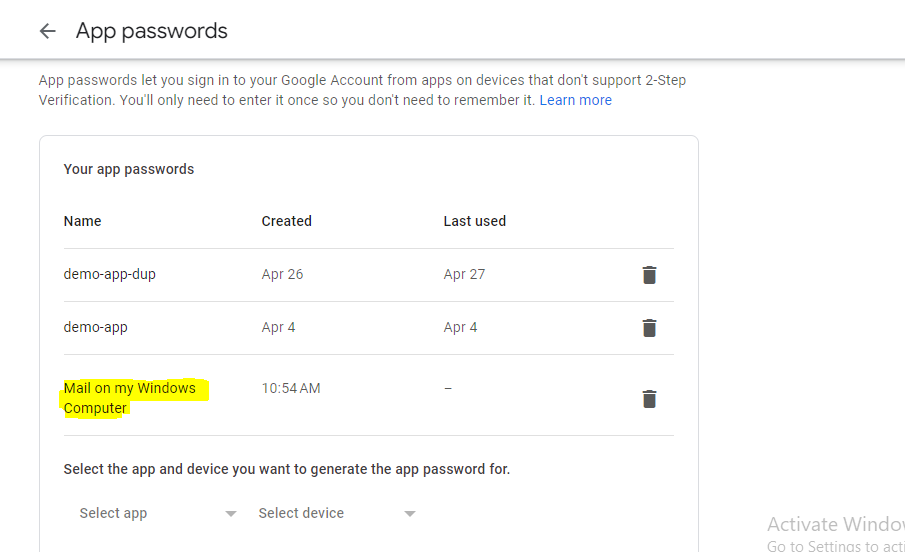
Copy the 15 letters password generated. We’ll need it in our application.
MAIL SERVER:
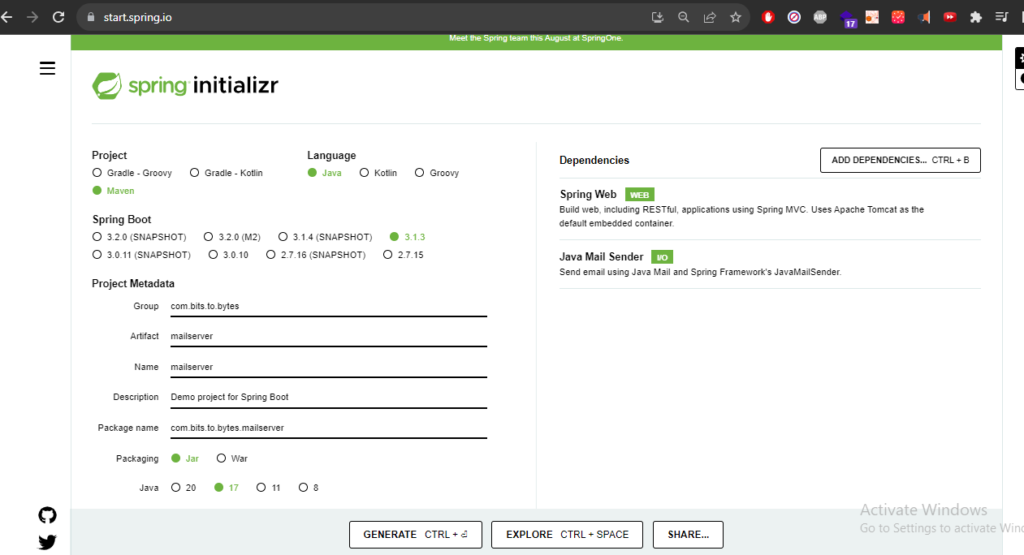
Create a Spring boot project from start.spring.io with the following dependency:
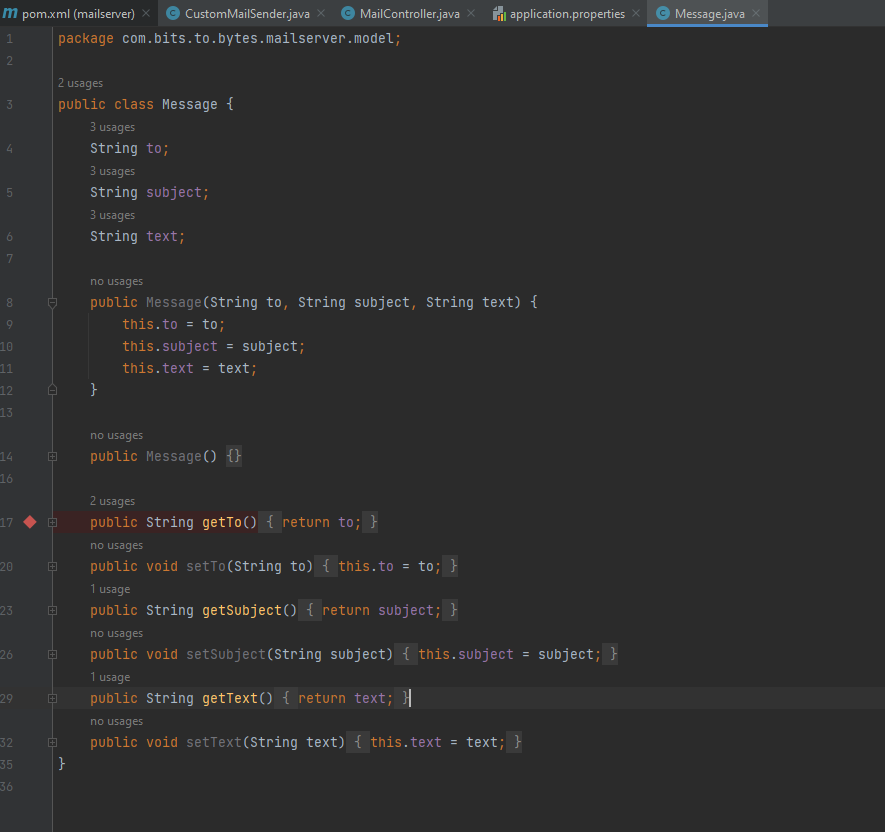
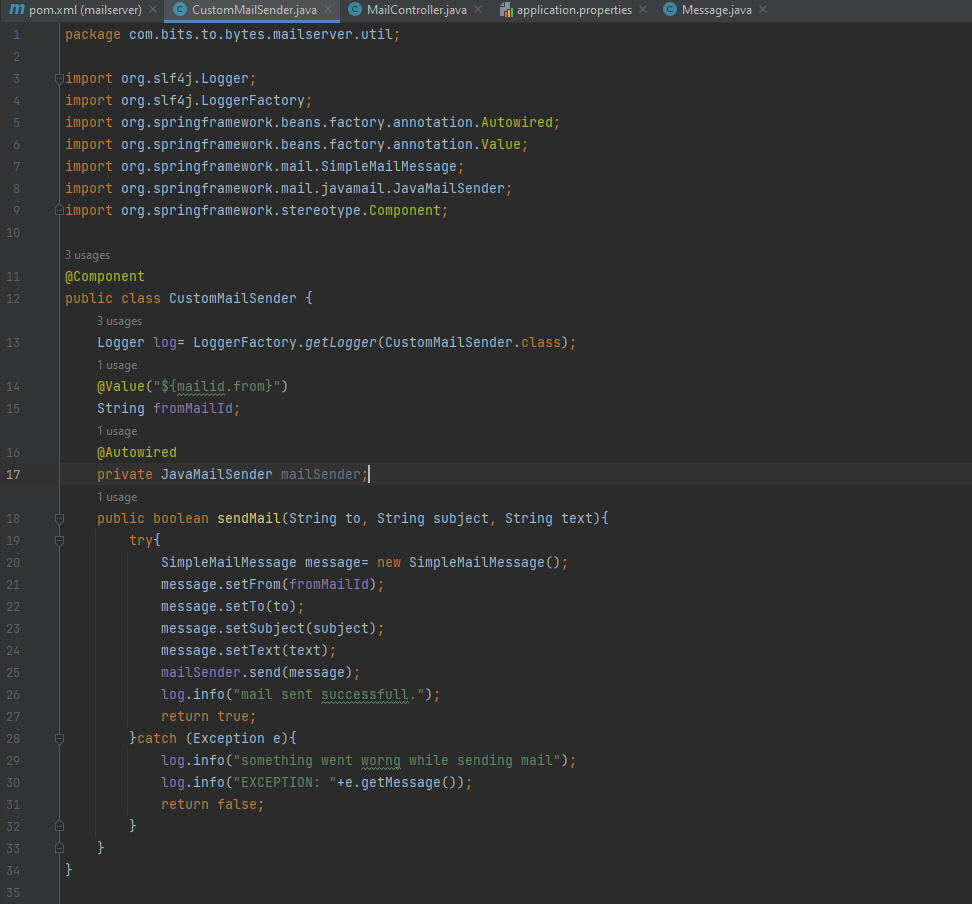
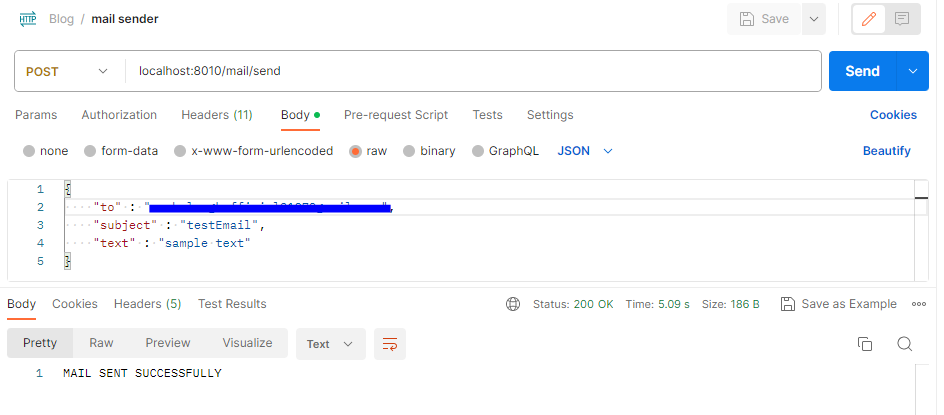
Lets create a Message object which will have the fields: “to”, “subject” and “text”. We will request these details from the user. Then we’ll create logic to send the mail.

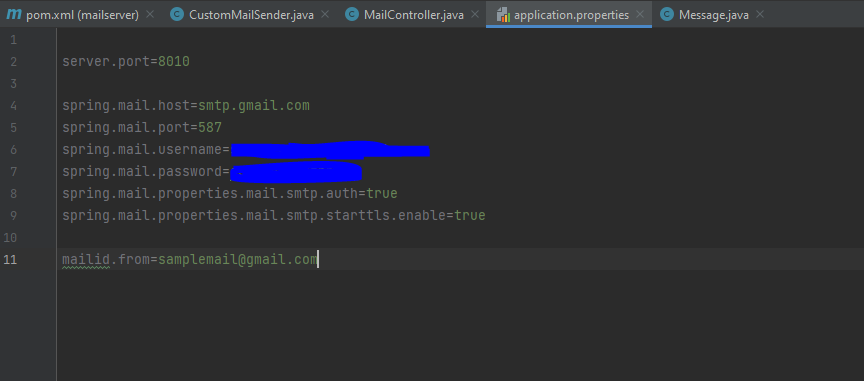
Lets specify the properties for mail setup:
TESTING:
Request:
LOGS:

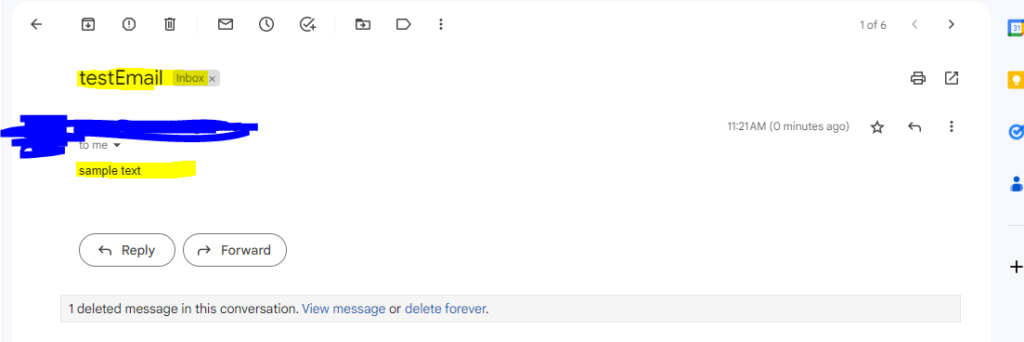
MAIL RECEIVED IN GMAIL:
