jenkins integration with spring boot
Download and install Jenkins
Here is a very detailed documentation for downlaoding and installing jenkins in you local system: https://www.guru99.com/download-install-jenkins.html
Getting started with Jenkins
After installing Jenkins, we can create a new Project :

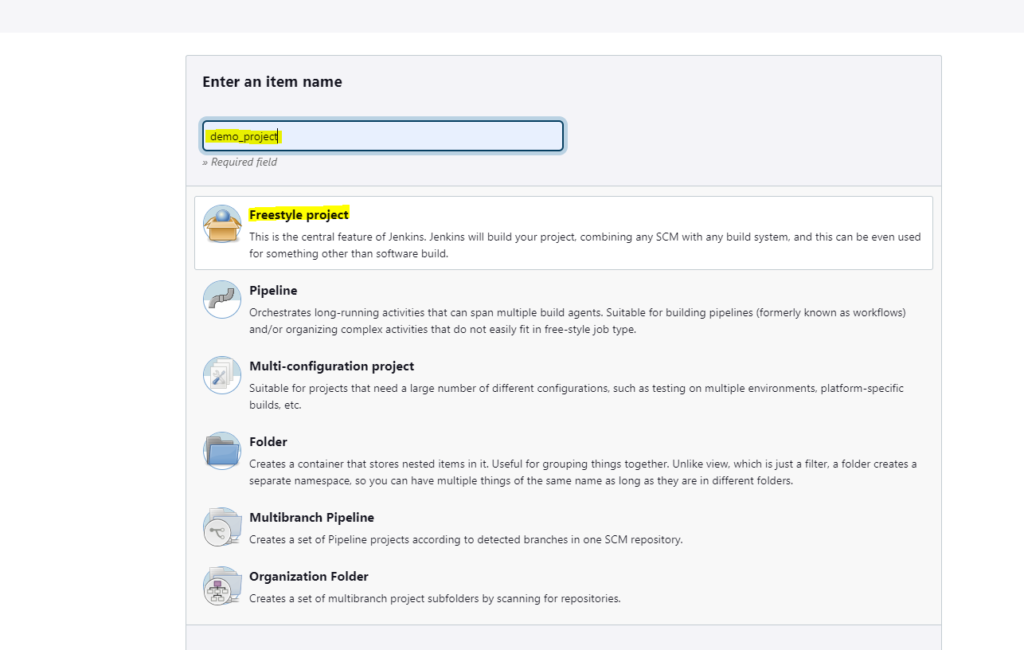
Provide a name to the project :
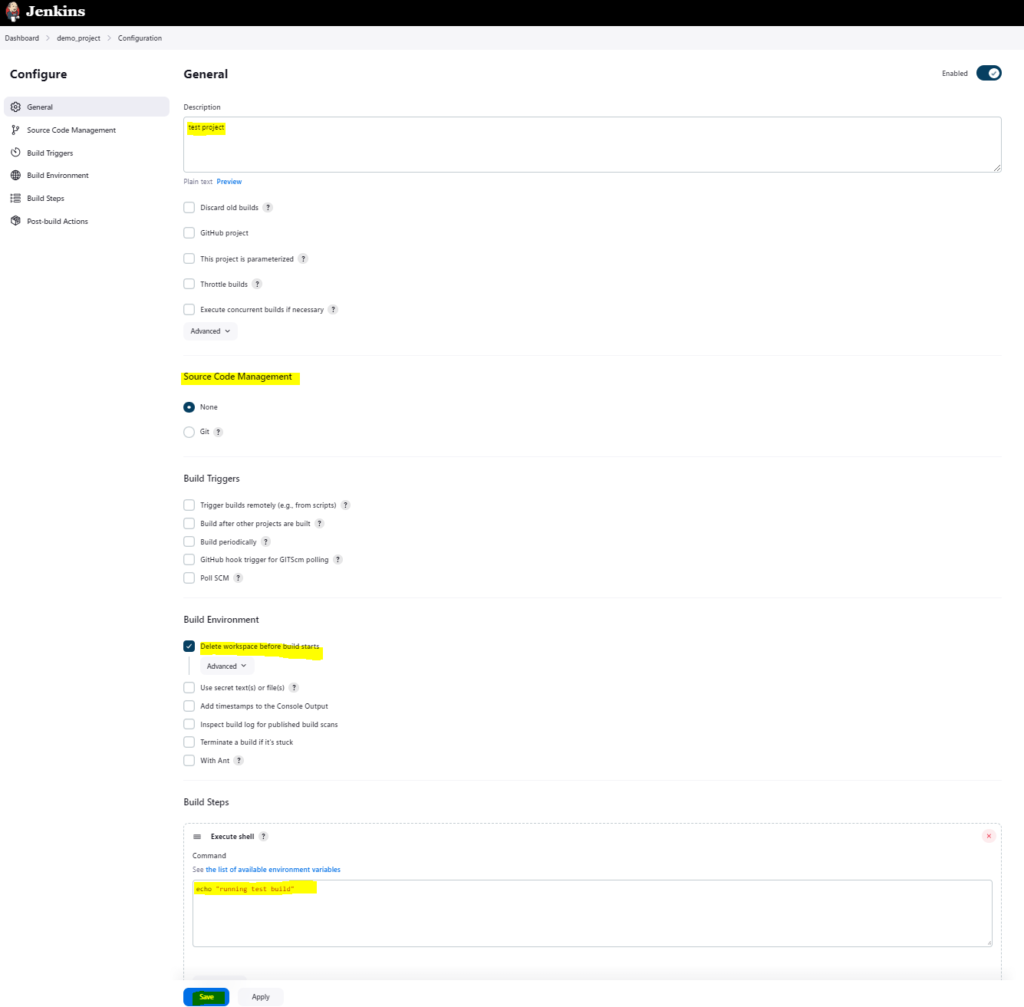
Configure the project to build. We can execute commands while the build is running in the Build Environment section. Also we can provide Git config in the Source Code management section. We will learn about this more in the next section :
After saving the config, lets build the project using the build now option :
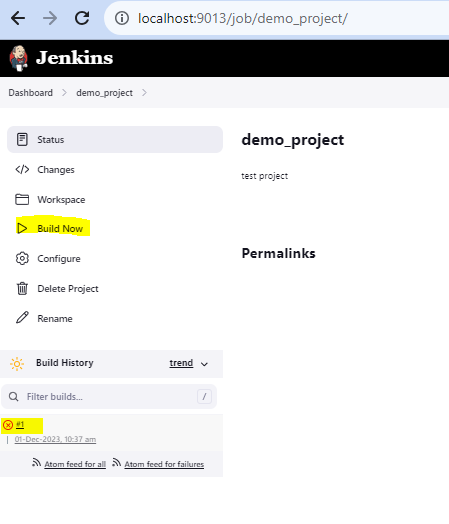
We see that the build has failed. Lets see the logs to find out more about the failed job. To see logs, click on the build and then go to Console Output section :
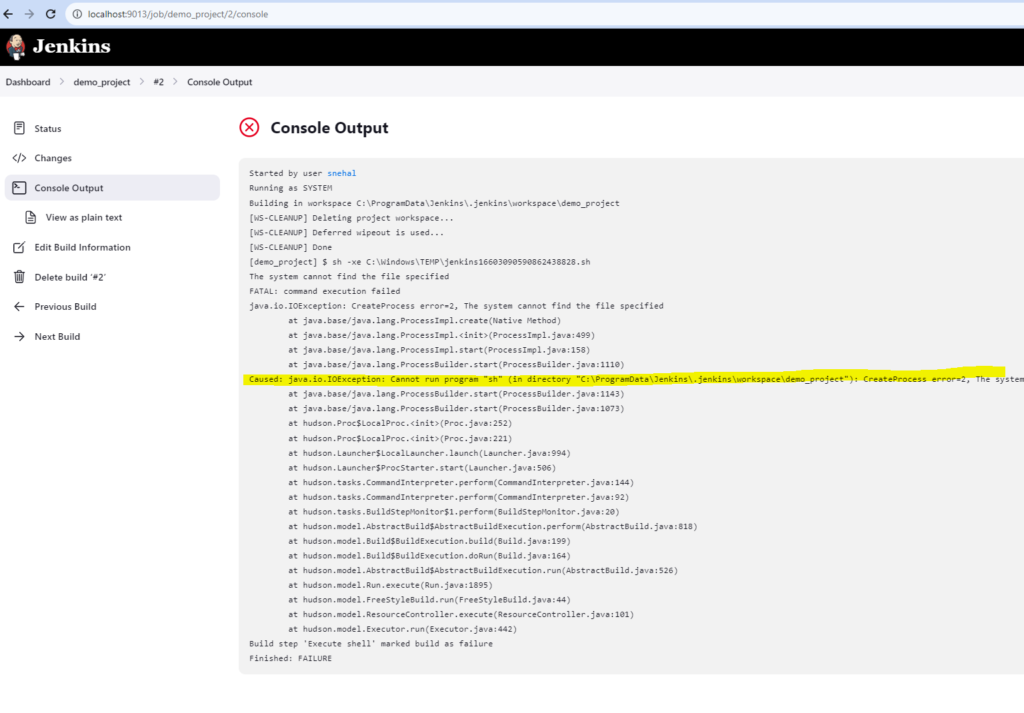
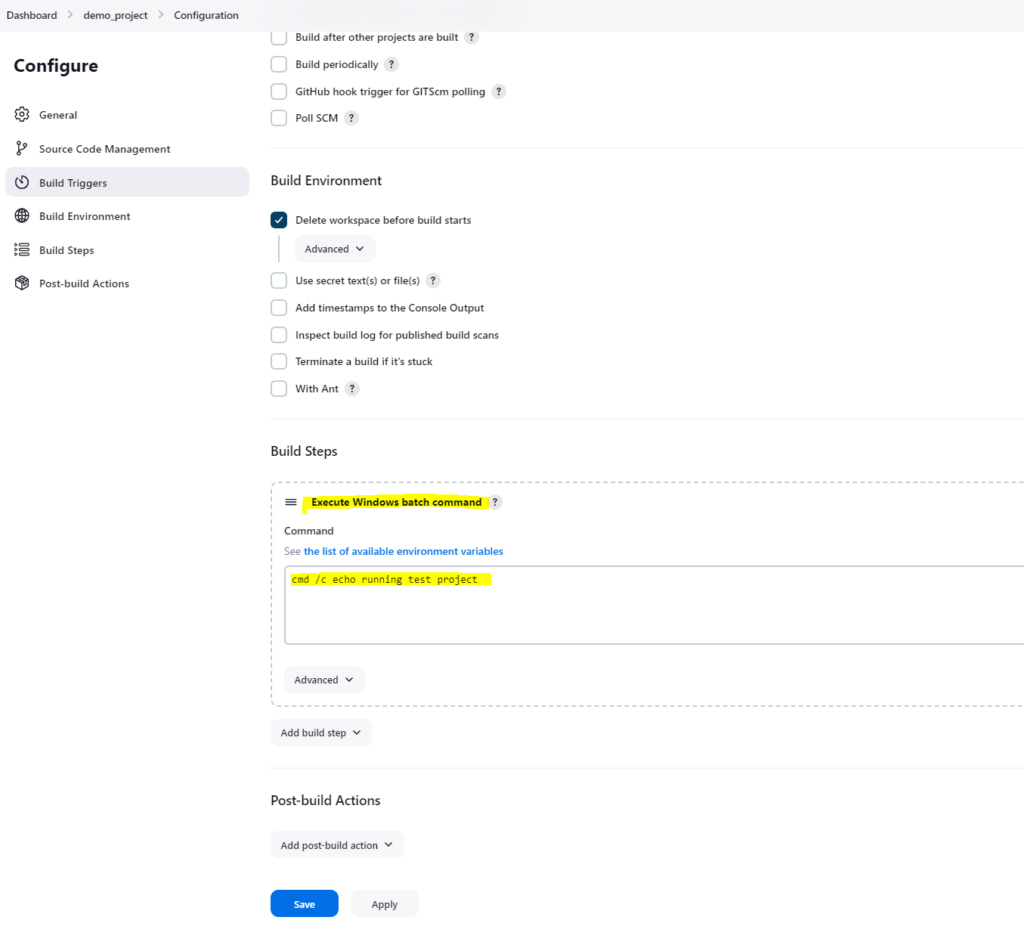
From logs we can conclude that the build failed as it was not able to execute the echo command. Which makes sense as I am using windows. So lets change the config to Execute Windows batch command instead of Execute Shell :
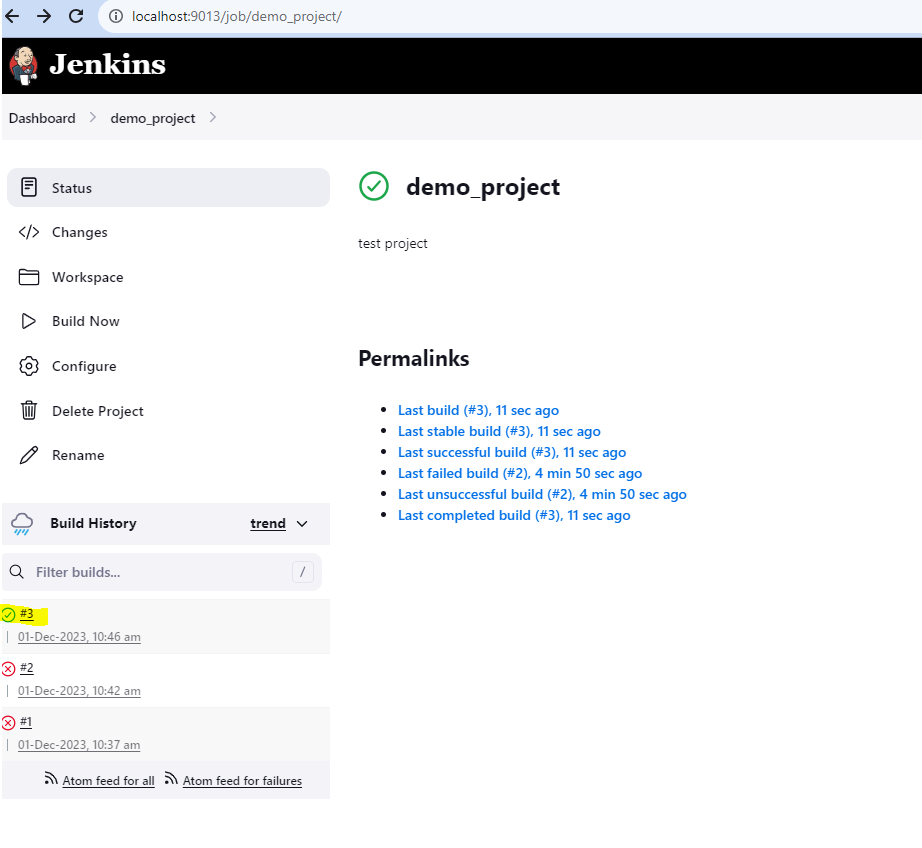
Lets build again and we see the build passes :
Lets see logs :
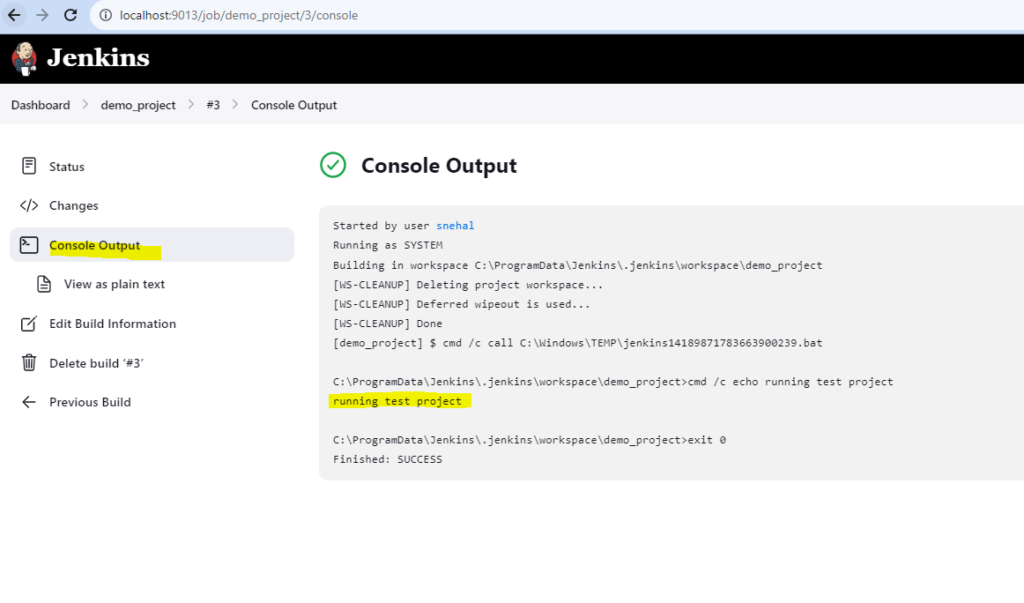
The build is echoing our statement.
Integrating Spring Boot Project with Jenkins
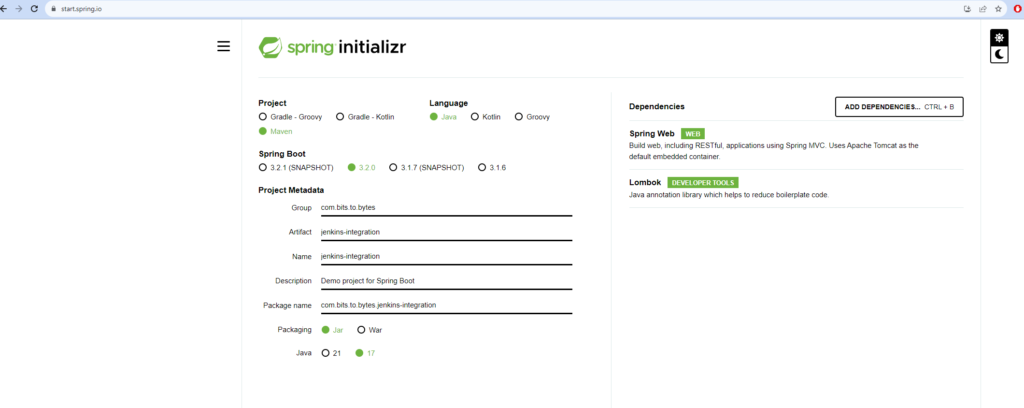
Create a new Spring boot project with following dependencies and expose a demo endpoint :
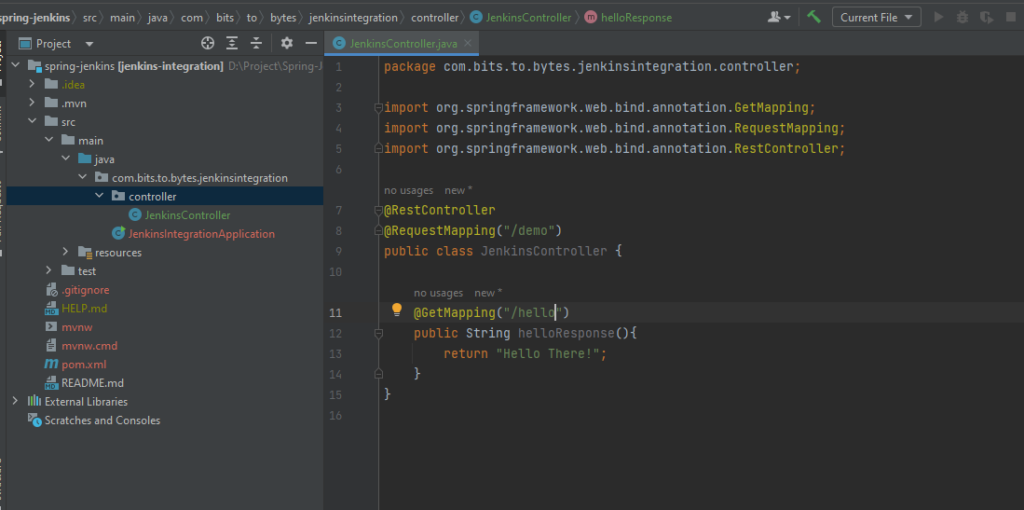
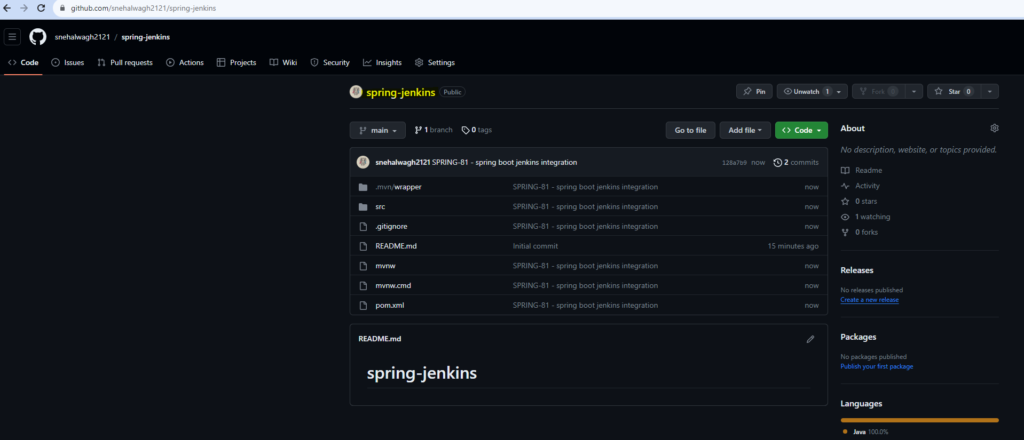
Now commit this code to a git repo :
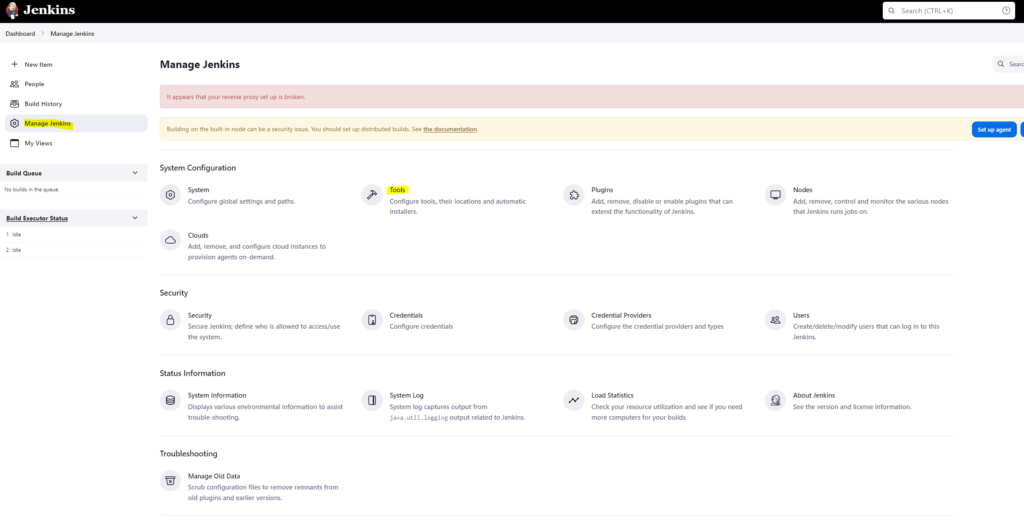
Since maven in required, we’ll have to install it in our jenkins. For that you need to go to Manage Jenkins – Tools
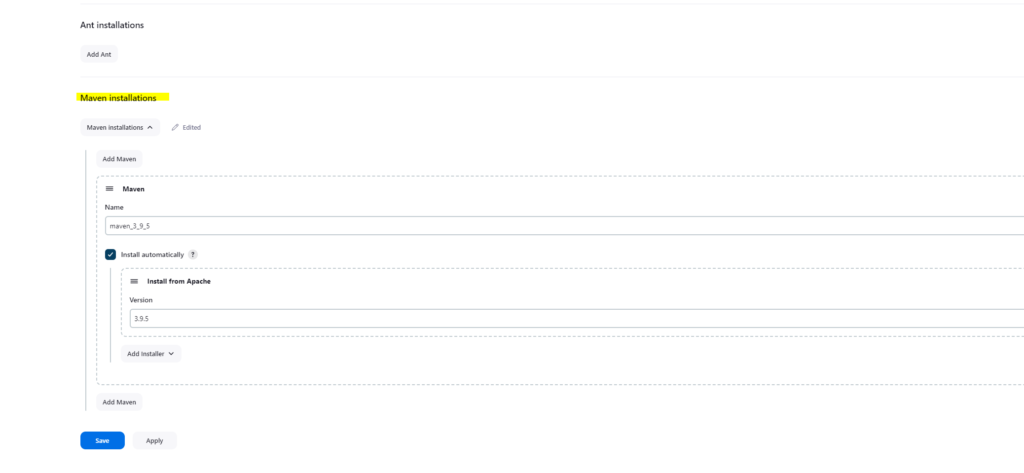
Then scroll down to find Maven and update:
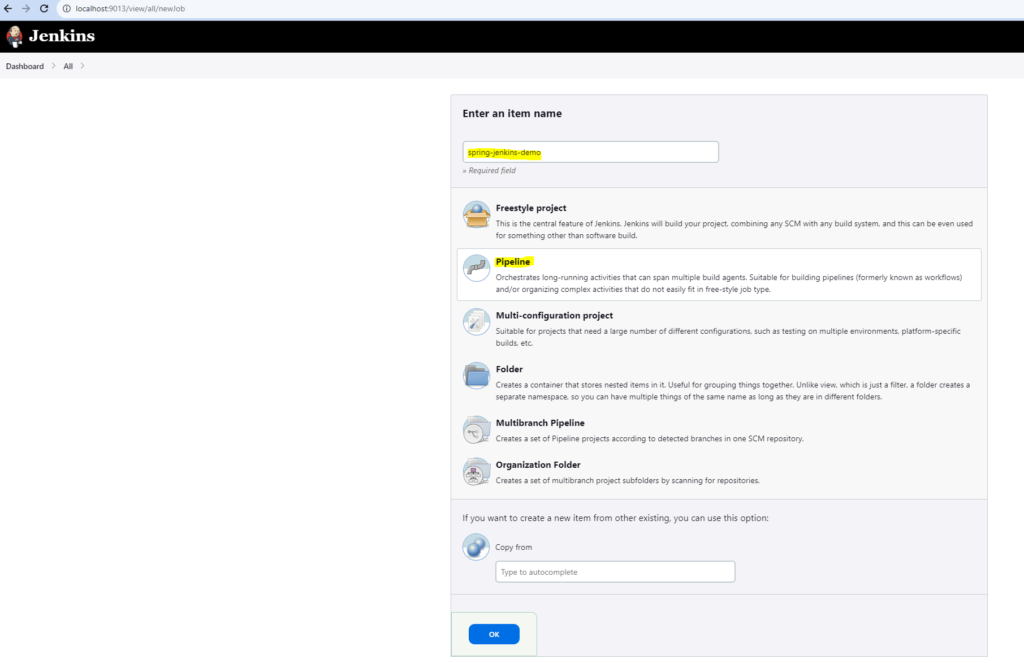
Now lets create a new project in jenkins to link our github repo:
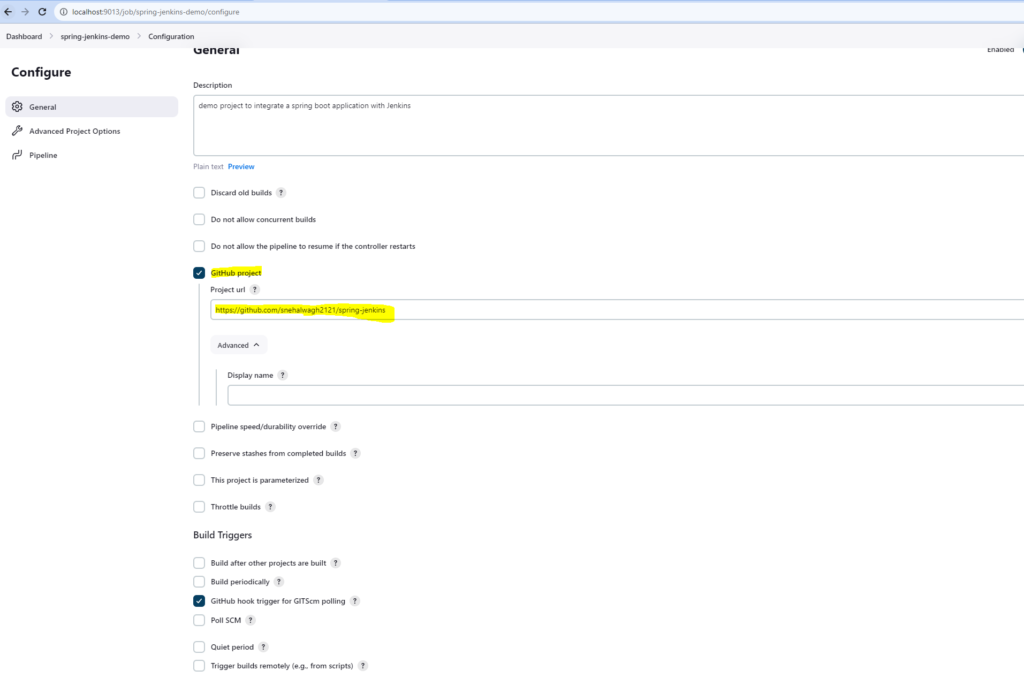
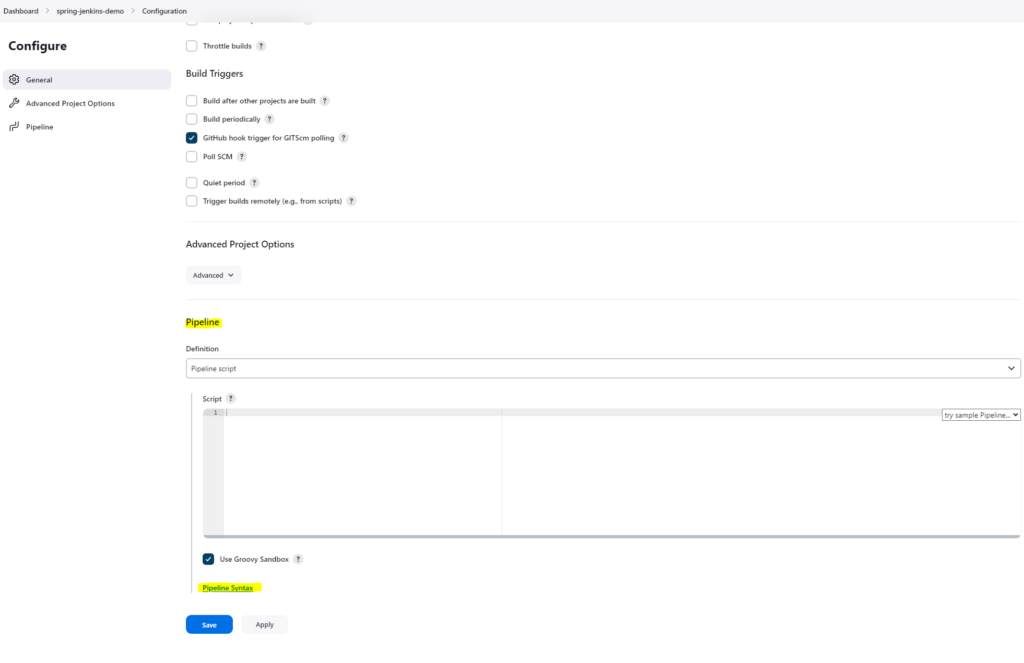
In config provide github repo url :
Now we need to provide pipeline commands which will checkout our git repo and build the project. For that, lets click on pipeline script which will generate the script for us :
In Sample step, choose checkout: Check out from version Control, Provide the github repo url, set credentials if your repo is private, Provide the branch name
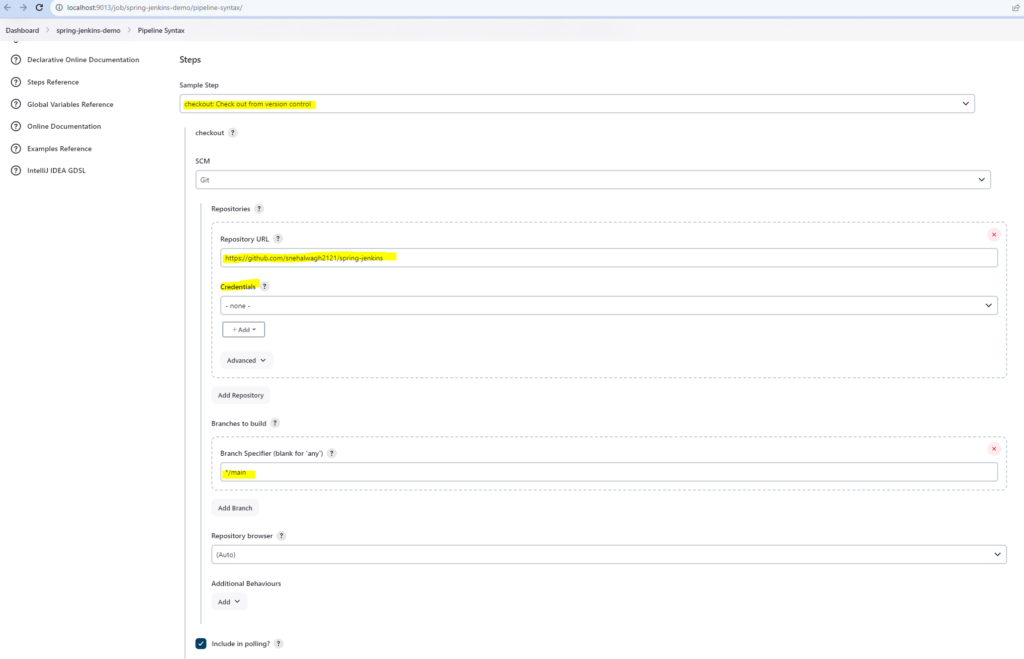
Now click on generate pipeline script and copy the script generated.

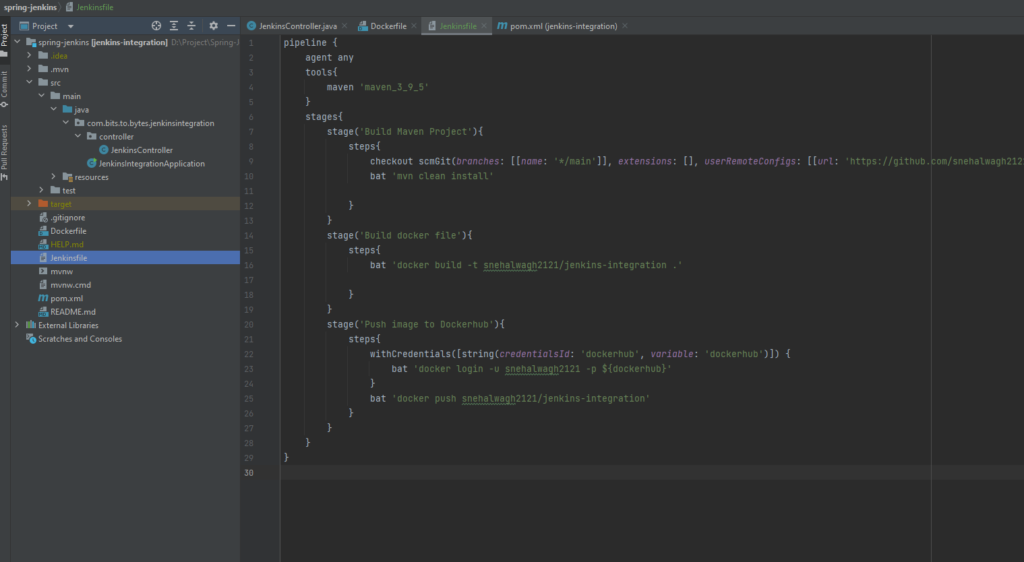
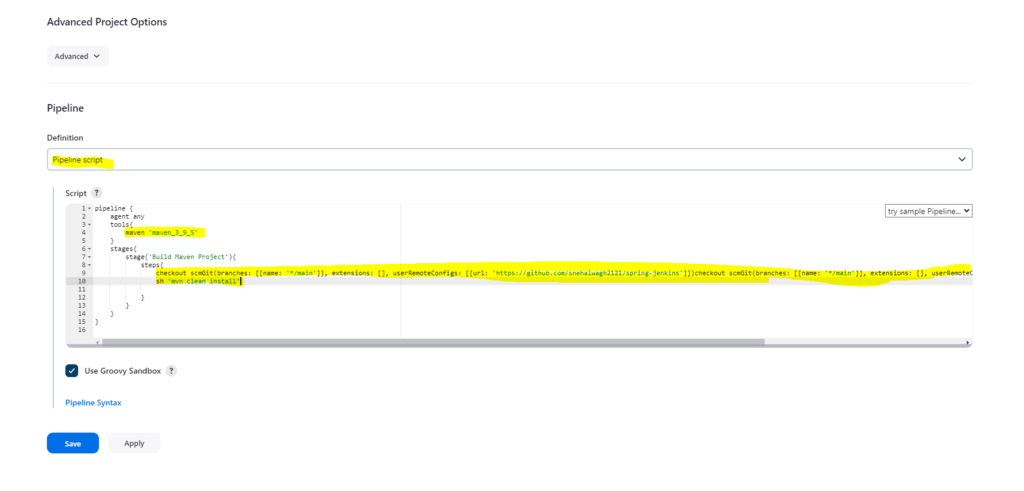
Now create the script like below, in tools provide the maven name you created before. In stages paste the pipeline script we generated from pipeline syntax and provide mvn clean install command.
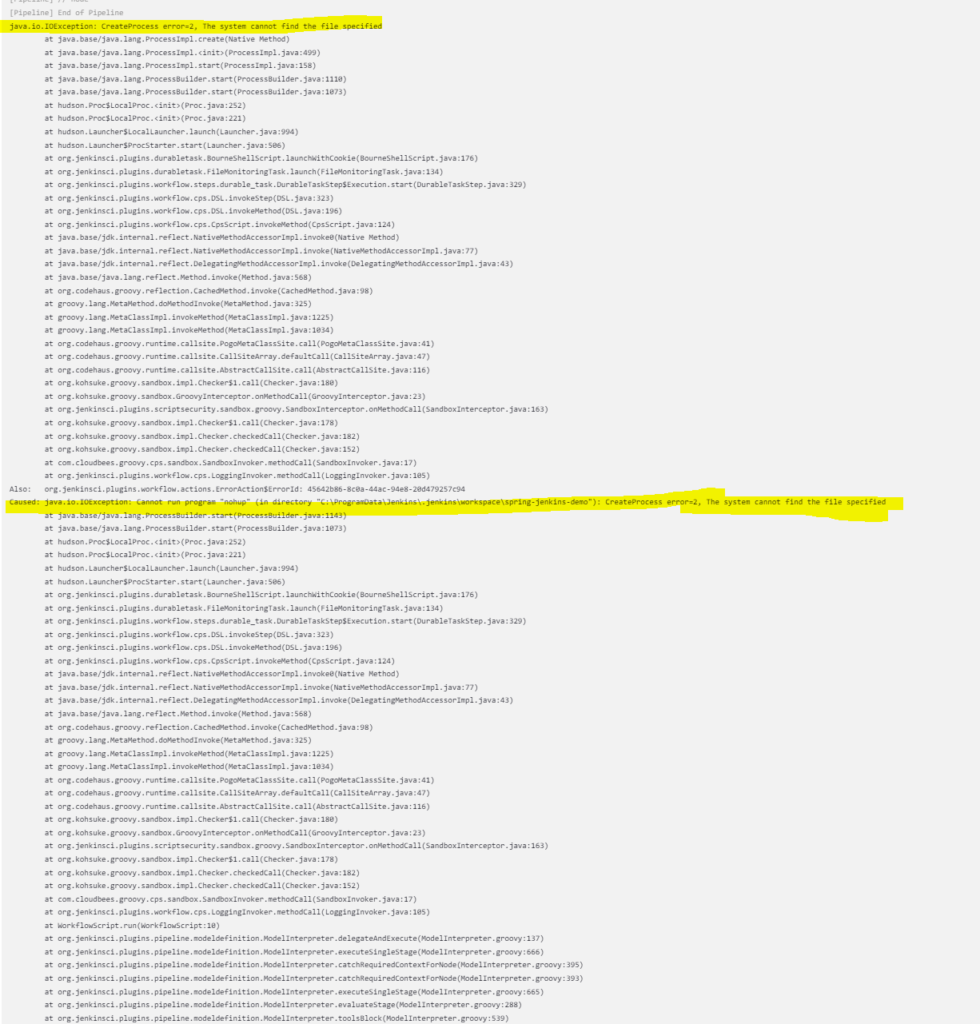
But when we build the project, we get exception. This is because I am using windows and i have provided sh command in pipleine script which is linux based. So i need to modify it to bat command.
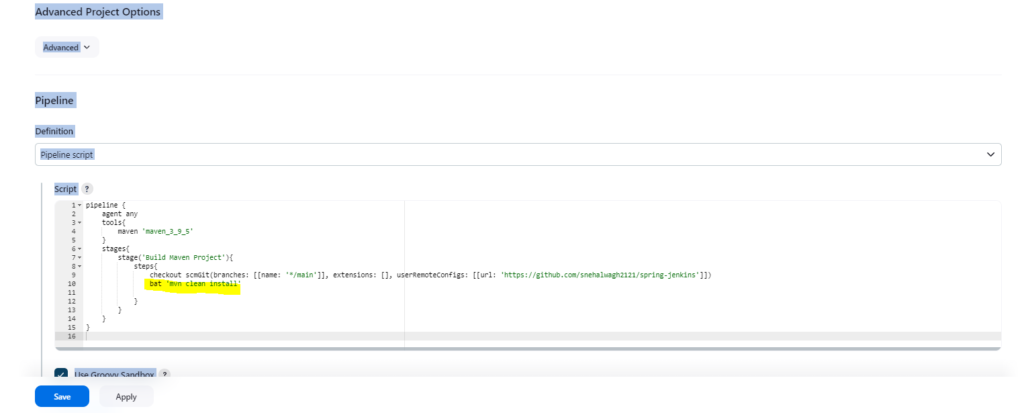
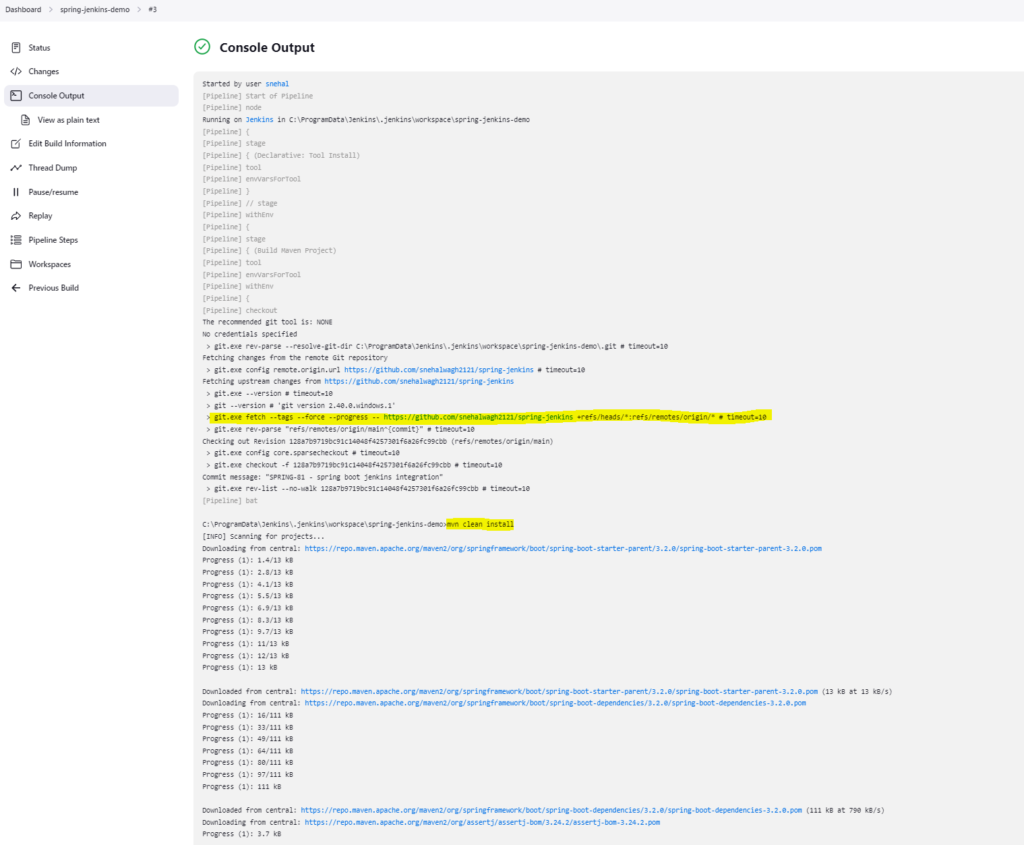
Now when we build the project, the build is passed.
Create Docker Images and Push to Docker Hub from Jenkins
Now moving forward, wouldnt it be cool to automate docker building and docker push to docker hub. Well sounds interesting to me, so lets see how its done.
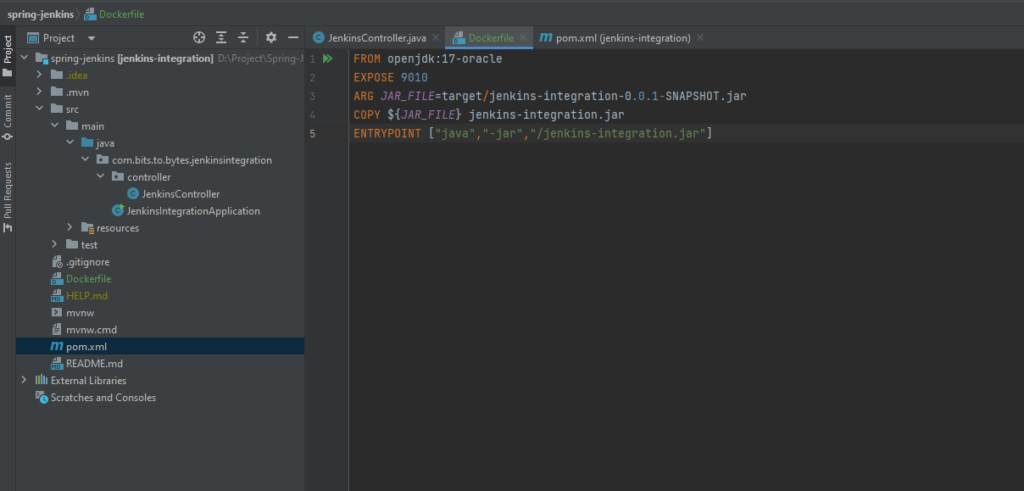
Well lets first start our docker desktop and create a docker file in our project. Then push these changes to our github repo and build the project so that the jar is created.

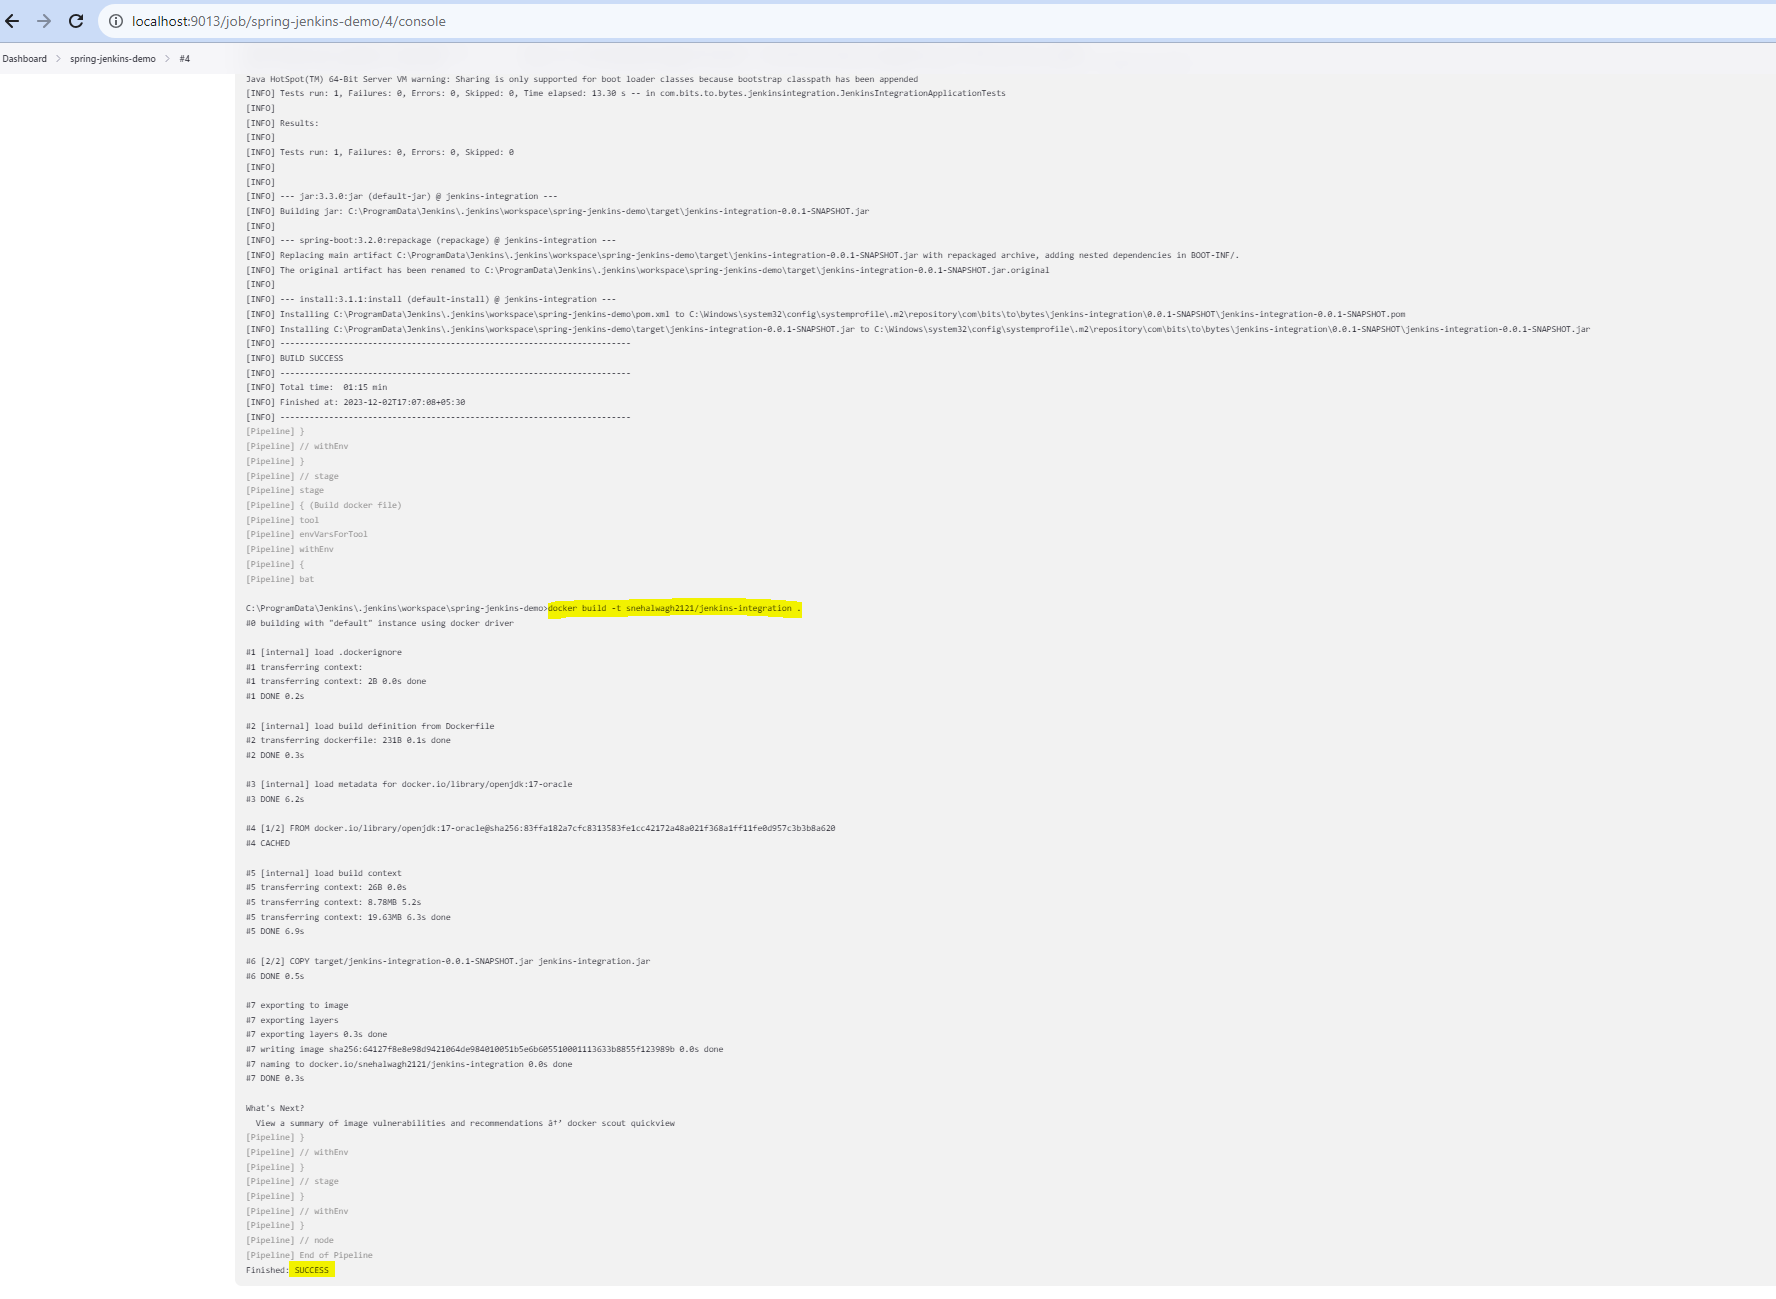
Lets build the jenkins project and see whether the image is built or not.
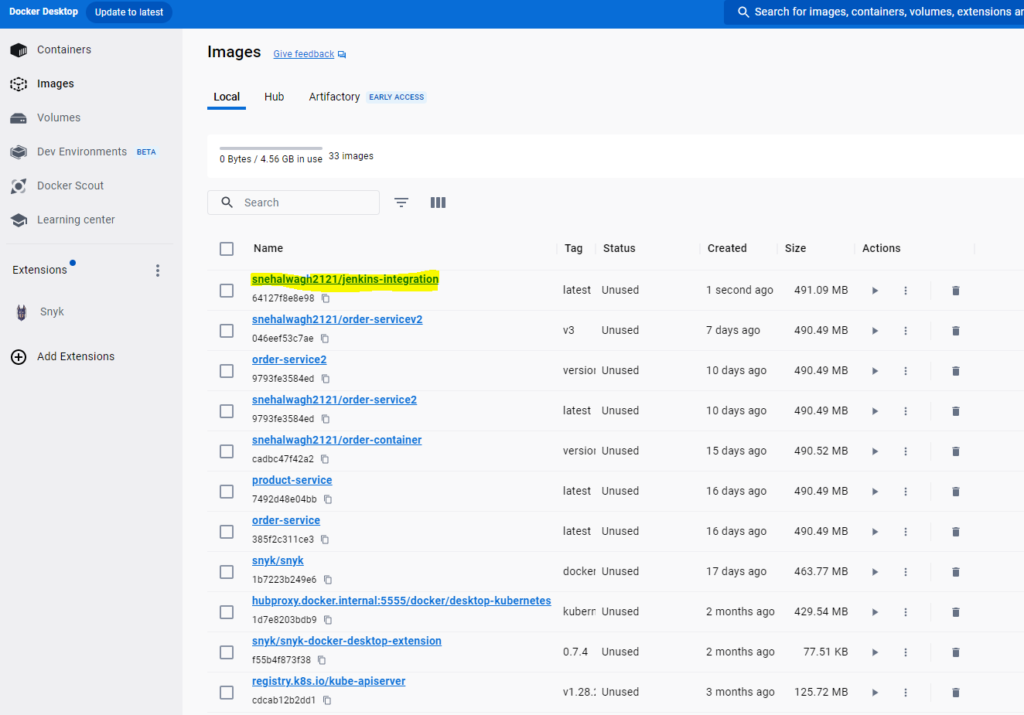
Lets write script to push this docker image to our docker hub. For that we would have to login to docker so that jenkins can access our dockerhub. Lets use pipeline syntax to use the creadentials.
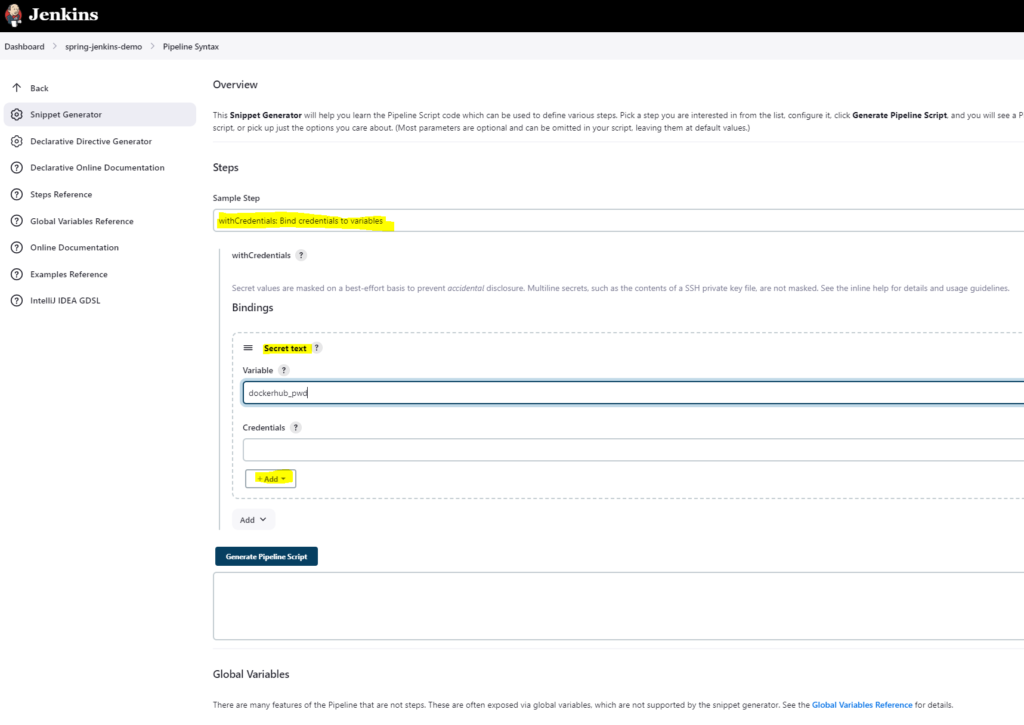
Lets click on pipeline syntax in Configuration window and select sample step as with Credentials: Bind Credentials to variables, select secret text in Bindings and provide variable name. Now click on Add and select Jenkins from the dropdown:
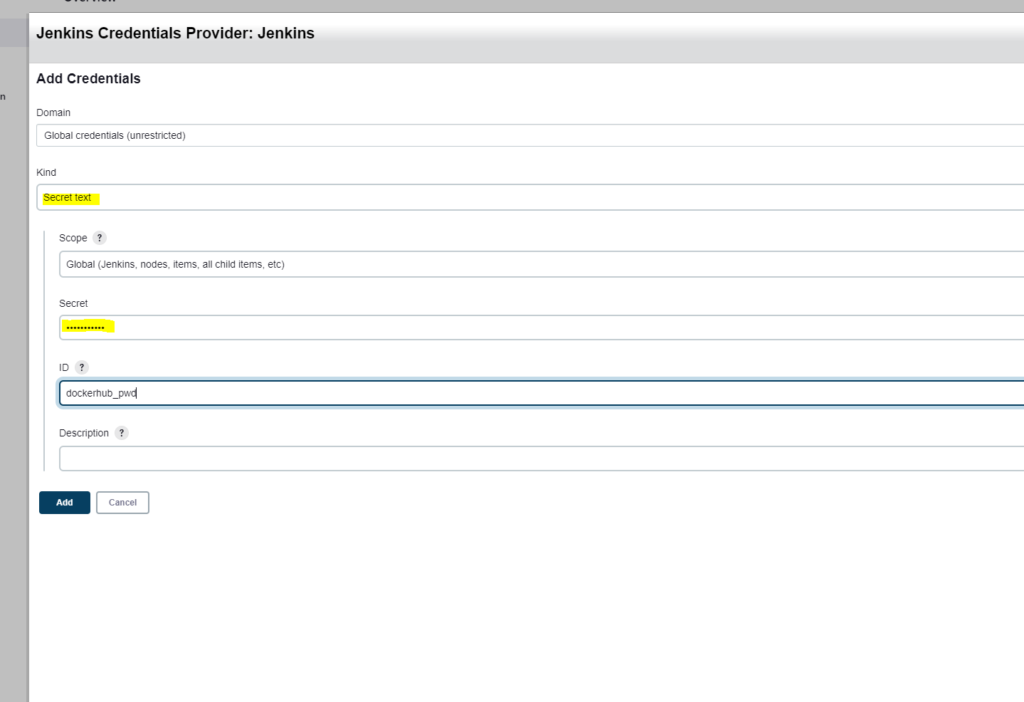
Then in the new popup, select kind as Secret text, put your dockerHub password in Secret and provide some id:
Click on Add and then click on Generate Pipeline Script. Copy this script and append in our pipeline scripts:
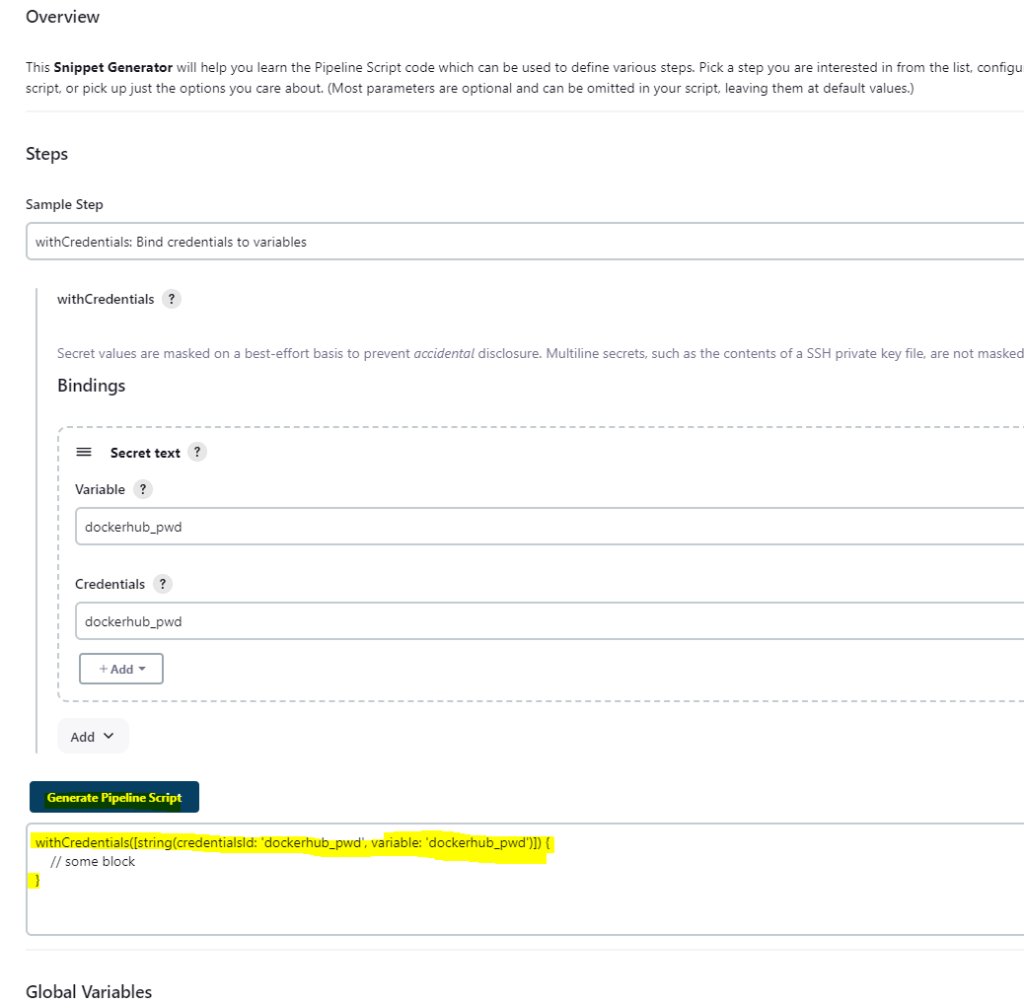
Now that we have script to use credentials via variables, lets write script for docker login and docker push :
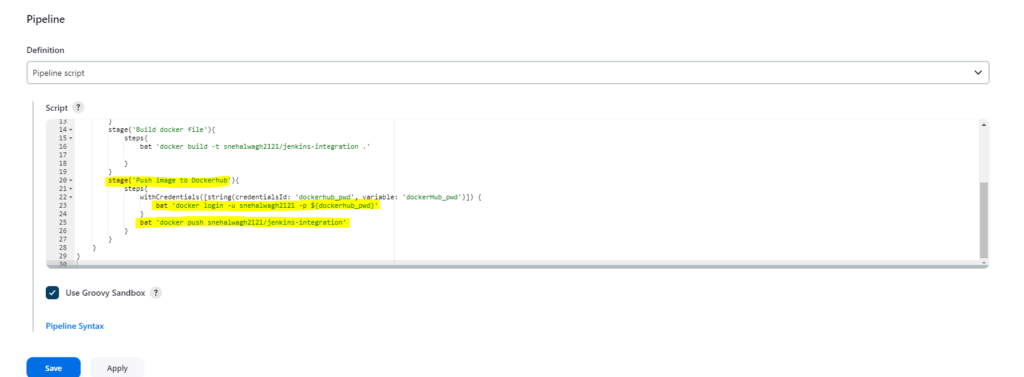
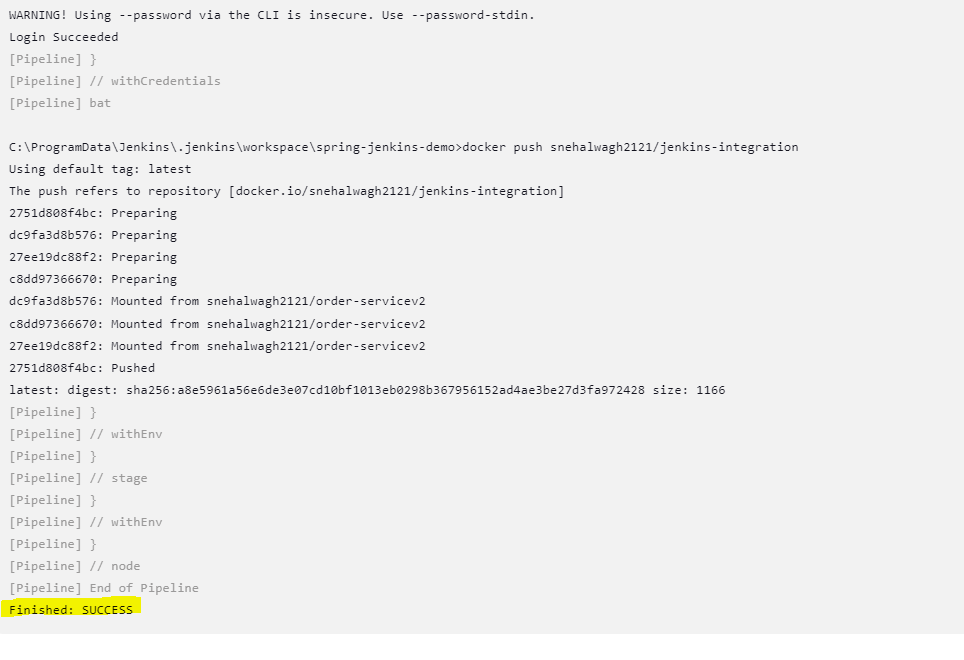
Lets build and see if the image is pushed to our docker hub :

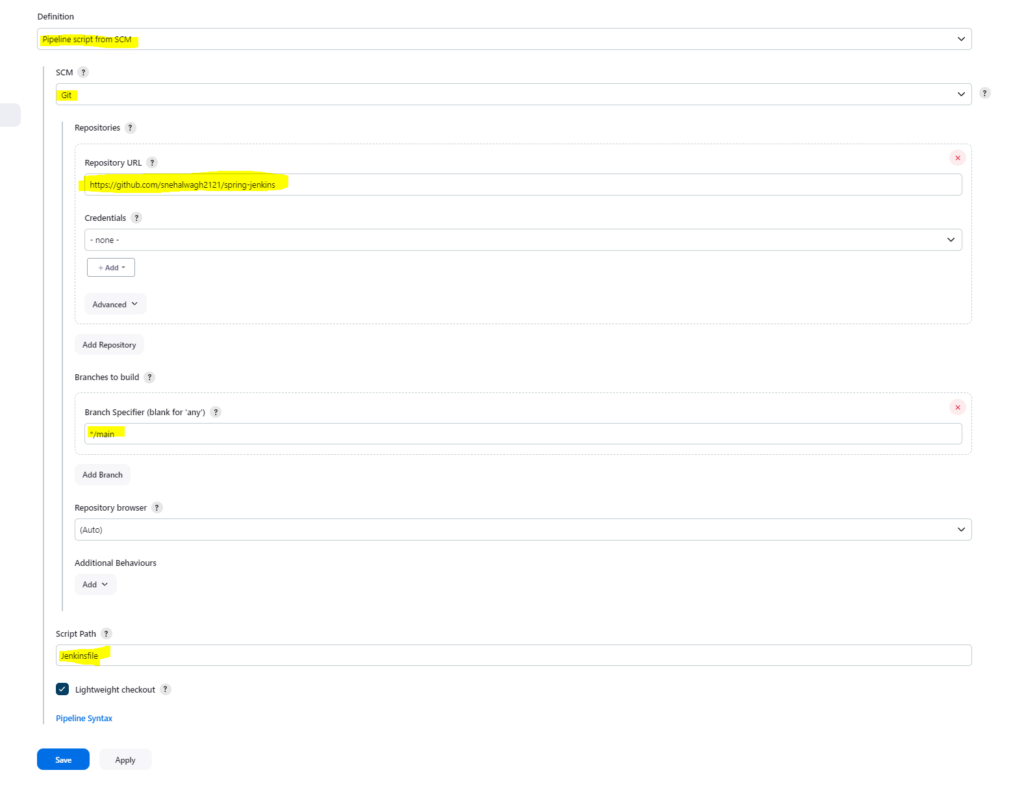
Now instead of writing the scripts in the jenkins, we can create a jenkins file in our project as let Jenks execute it instead.
