Download and install kubectl and minikube
Follow the steps provided in the doc to download and install kubectl: kubernetes.io
Follow the steps provided in the doc to download and install minikube: minikube
KUBERNETES SPRING BOOT INTEGRATION
RUN MINIKUBE:
check status of minikube using command: minikube status

If the status is sopped, start minikube using command: minikube start
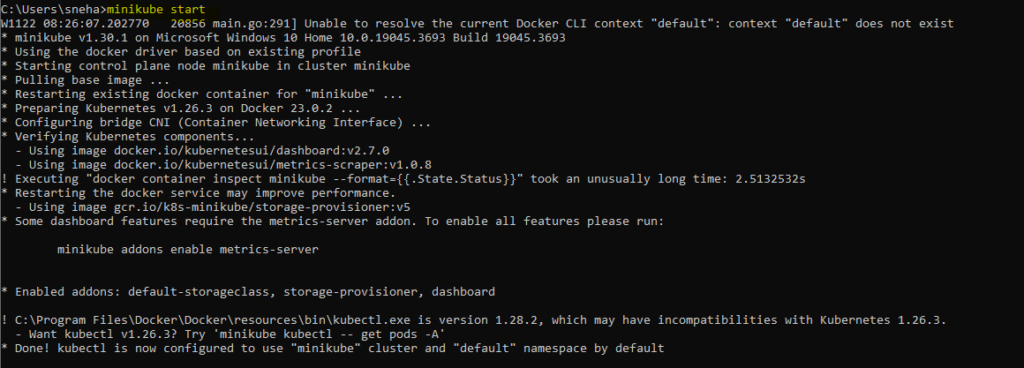
check status again: minikube status

SET DOCKER ENV:
step 1: minikube docker-env

Copy paste the last line from above output @FOR /f “tokens=*” %i IN (‘minikube -p minikube docker-env’) DO @%i

CREATE DEPLOYMENT:
Command to create deployment from docker object: kubectl create deployment deployment-name –image=image-name:tag –port=port-number
Command to get all deployments: kubectl get deployment

Ready state shows 0/1. This means our deployment was not success. Lets check pods: kubectl get pods

pod ready state also shows 0/1. This means our pod was not success. Lets check logs: kubectl logs pod-name

Logs shows that the deployment was not able to fetch the image from repository. So lets push our image to our docker hub docker push reposioryname/imagename:tag
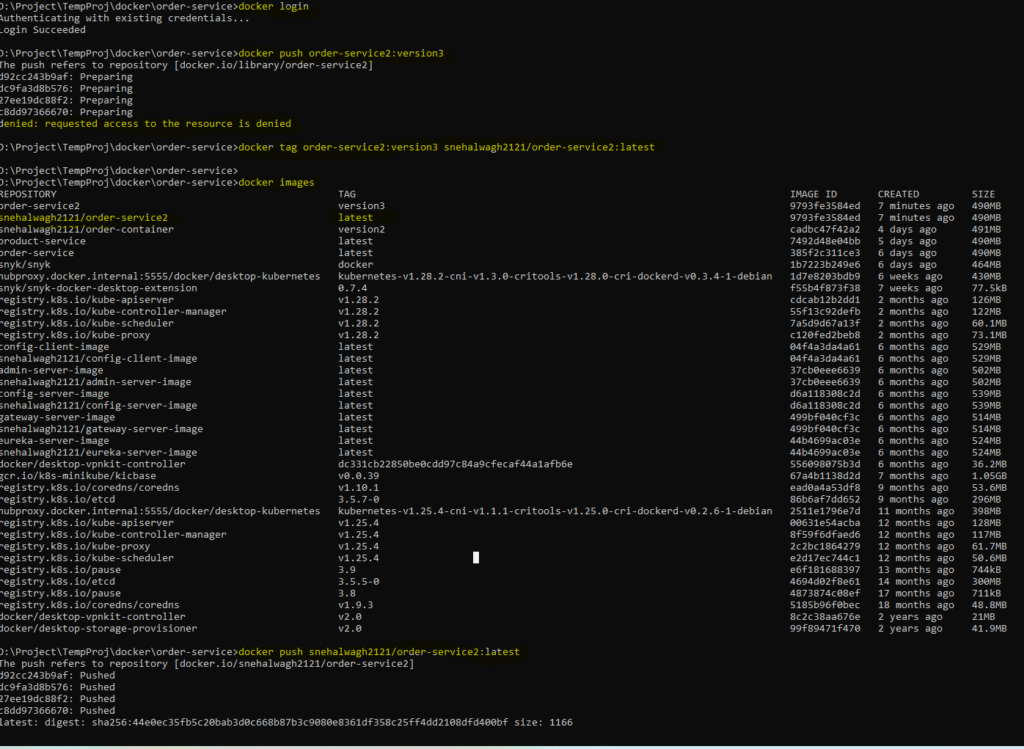
The image name should be of format repositoryname/imagename. Else it will throw request access exception while piushing the image. So as seen in the above snapshot, we have renamed the image to proper format and pushed the image to docker hub.
Lets ssh into minikube and pull docker image: minikube ssh
docker pull repository-name/image-name:tag
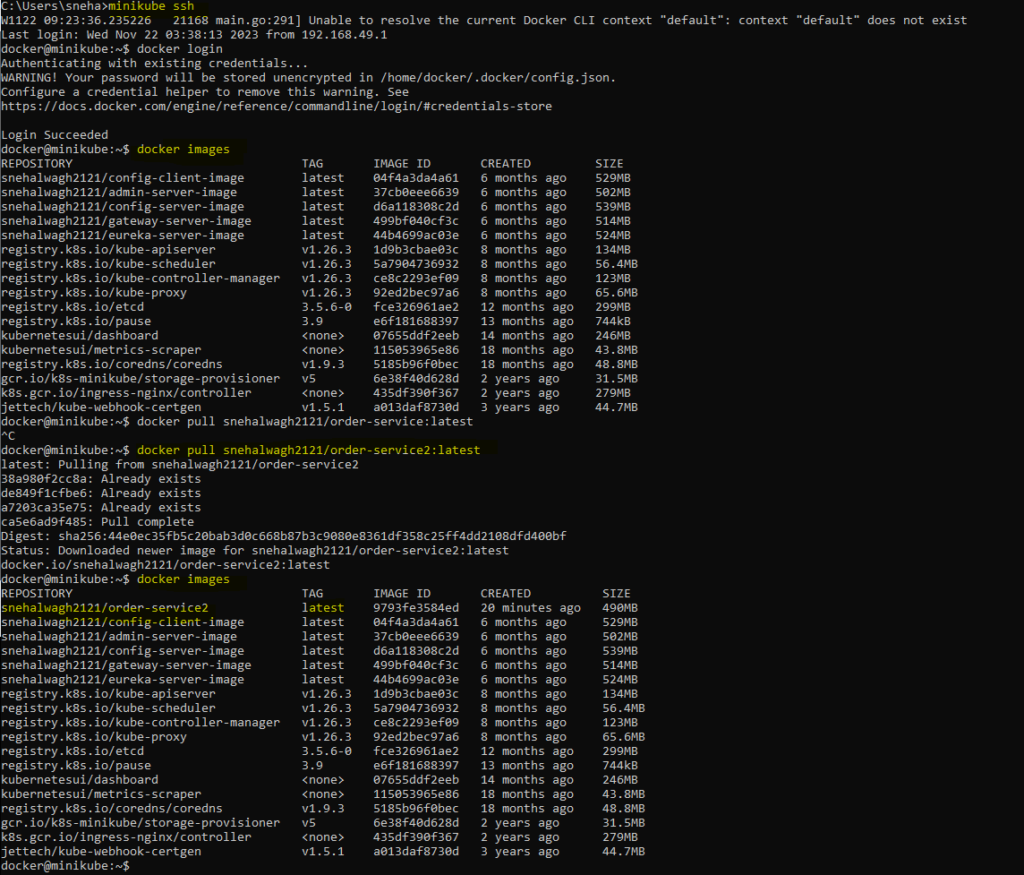
Now that we have the image, lets delete our prev deployment and create a new one: kubectl delete deployment deployment_name
kubectl create deployment deployment-name –image=image-name:tag –port=port-number
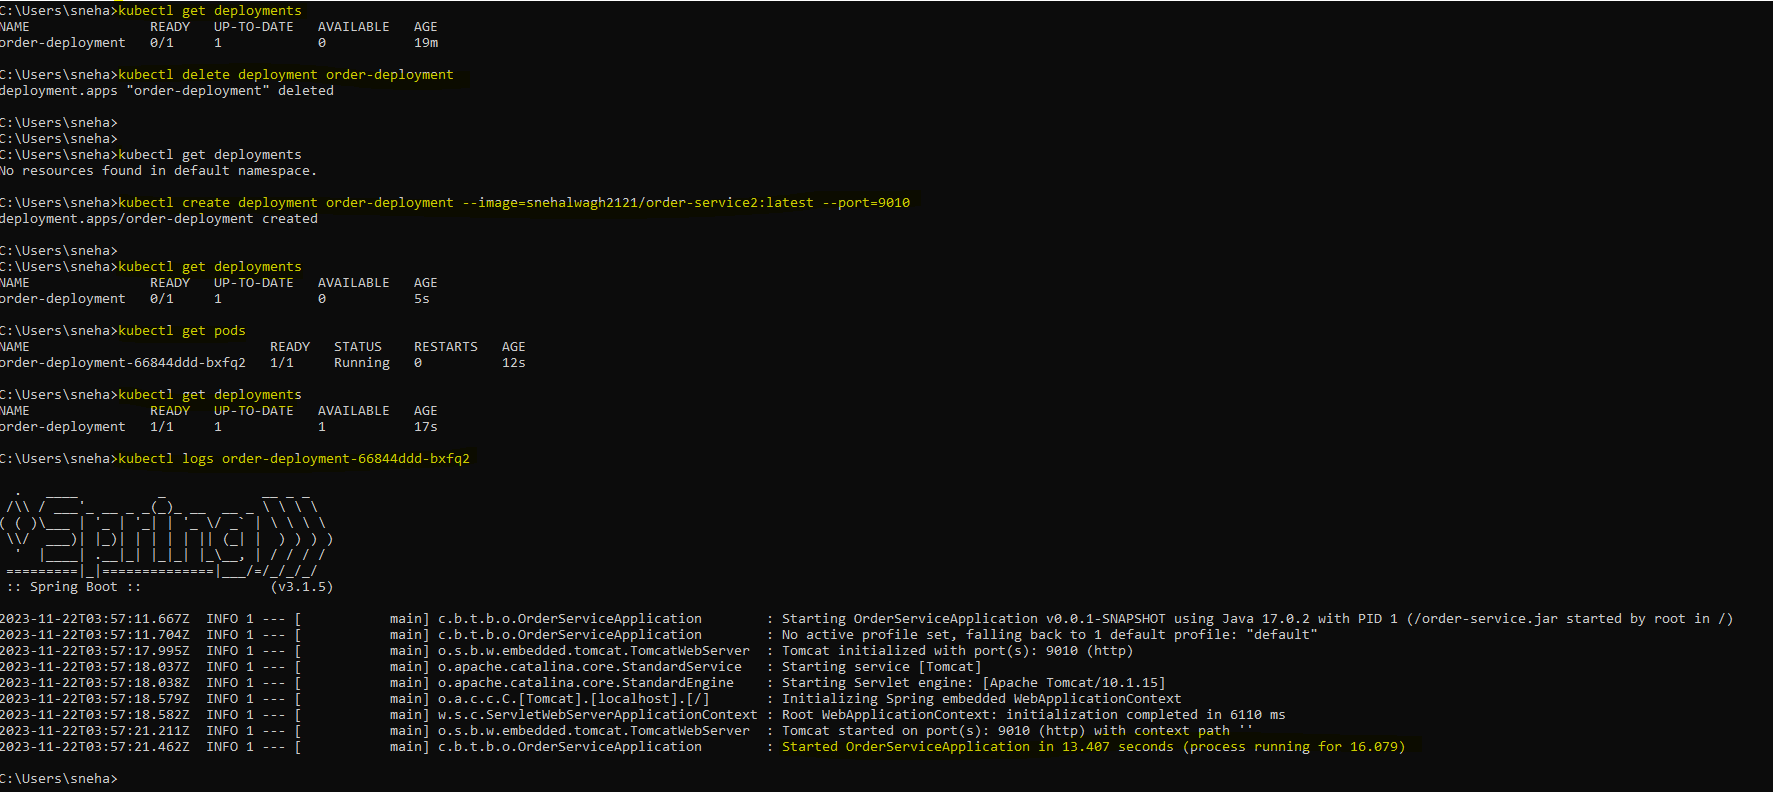
Now we see that our deployment was successful and our application is running successfully in pod
EXPOSE SERVICE:
Even after the deployment was successful, still we are not able to access our application from browser.
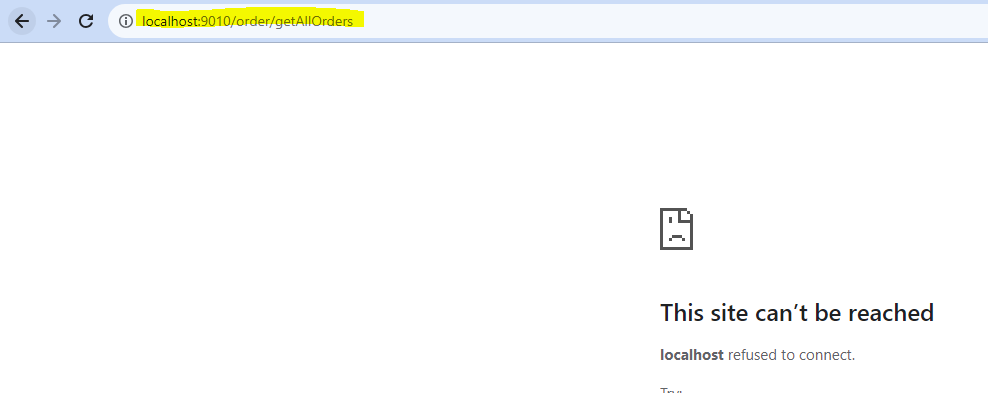
This is because our deployment is not exposed to outside world, for that we need to create service.kubectl expose deployment deployment-name –type=NodePort

port forward: kubectl port-forward service/service-name local_port:minikube_port

Now we can access our application:

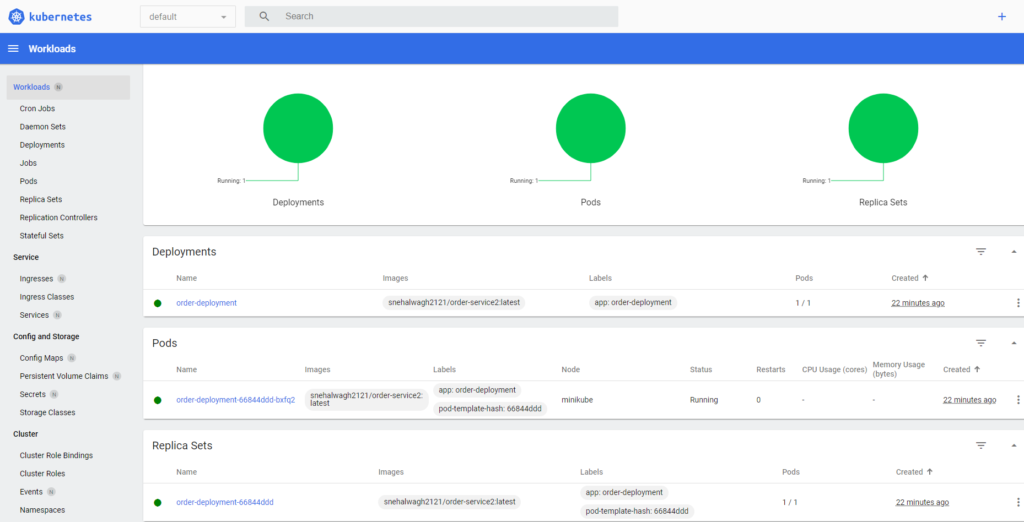
Minikube also provides way to access the dashboard usin command: minikube dashboard

Dashboard view:
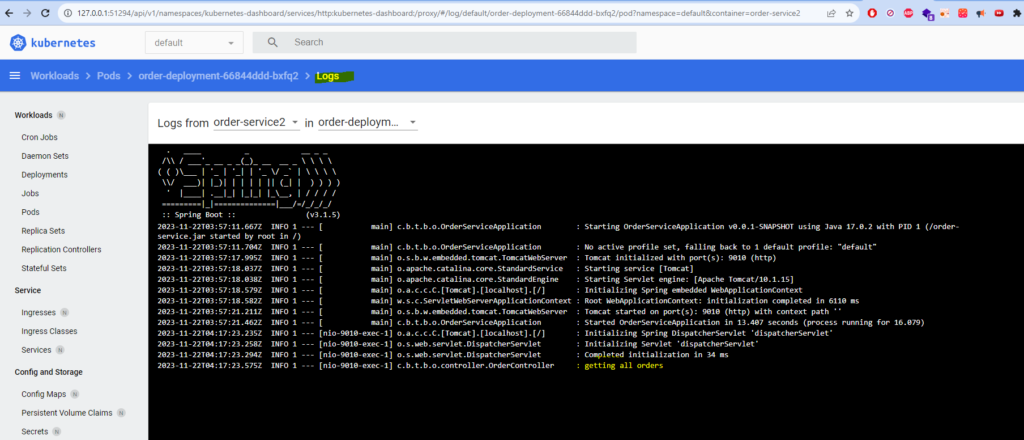
We can also check logs from dashboard by clicking on the logs of pods:

STOP AND DELETE:
Delete service and deployment :
kubectl delete service service-name
kubectl delete deployment deployment-name

STOP minikube : minikube stop

DELETE minikube : minikube delete

KUBERNETES SERVICE AND DEPLOYMENTS USING FILES
DEPOYMENT.YAML:
Deployment file for our order service:
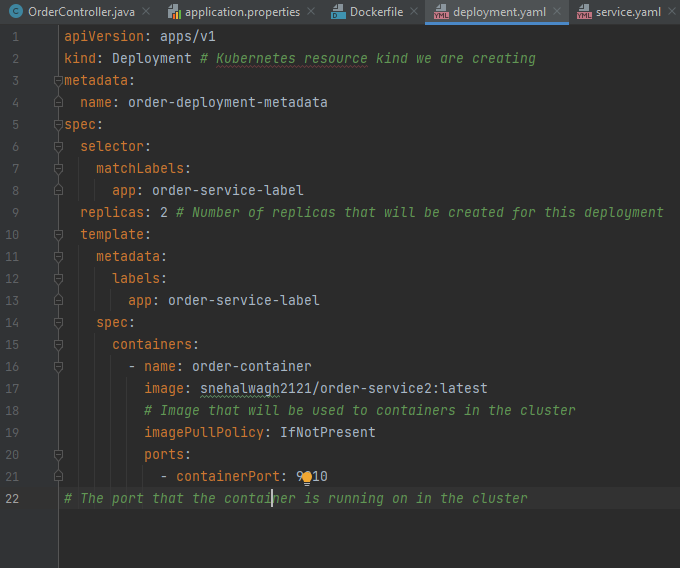
kind: Specifies the type of file like Deployment/Service
metadata.name: name of your deployment
spec.selector.matchLabels.app: This should match with our template.metadata.labels.app
replicas: Describes number of pods
spec.containers.name: Name of our docker container
spec.containers.image: Name of our docker image
spec.containers.imagePullPolicy: If image is not downloaded then download from docker hub
spec.containers.ports.containerPort: port that the container is running on in the cluster
EXECUTE DEPOYMENT.YAML:
Execute the deployment.yaml file using command: kubectl apply -f deployment.yaml

Check deployment status: kubectl get deployment
Check pod status: kubectl get pods
Check pod logs: kubectl logs pod-name
If there are any issues you, here are some list of commands that would help to troubleshoot:
get pod description: kubectl describe pod pod-name
get all pods with namespace: kubectl get pods -A
get nodes: kubectl get nodes -o wide
Get pods description in json format: kubectl get pods -o json
Get pods and container names in clean format: kubectl get pod -o=”custom-columns=NAME:.metadata.name,INIT-CONTAINERS:.spec.initContainers[*].name,CONTAINERS:.spec.containers[*].name”
SERVICE.YAML:
Service file for our order service:
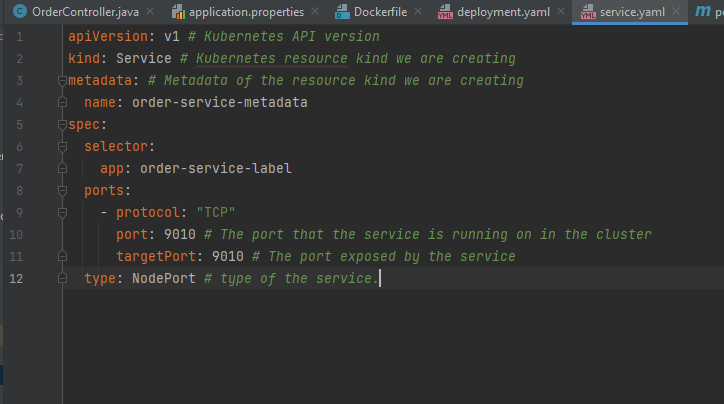
kind: Specifies the type of file like Deployment/Service
metadata.name: name of your service
spec.selector.app: This should match with our template.metadata.labels.app of deployment file
ports: Connects the cluster port with service port
spec.type: Type of service
EXECUTE SERVICE.YAML:
Execute the service.yaml file using command: kubectl apply -f service.yaml

get service status: kubectl get service
port forward: kubectl port-forward service/order-service-metadata 9010:9010
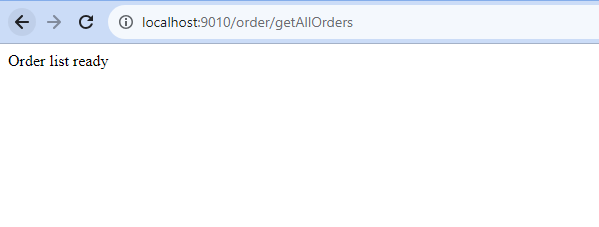
ACCESS ENDPOINT:
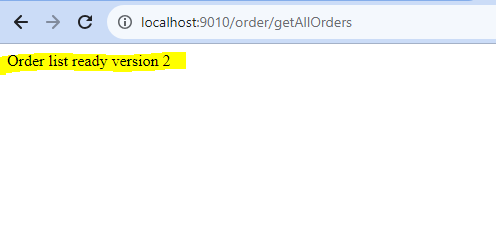
We can access our endpoint successfully from browser:
SCALING WITH KUBERNETES
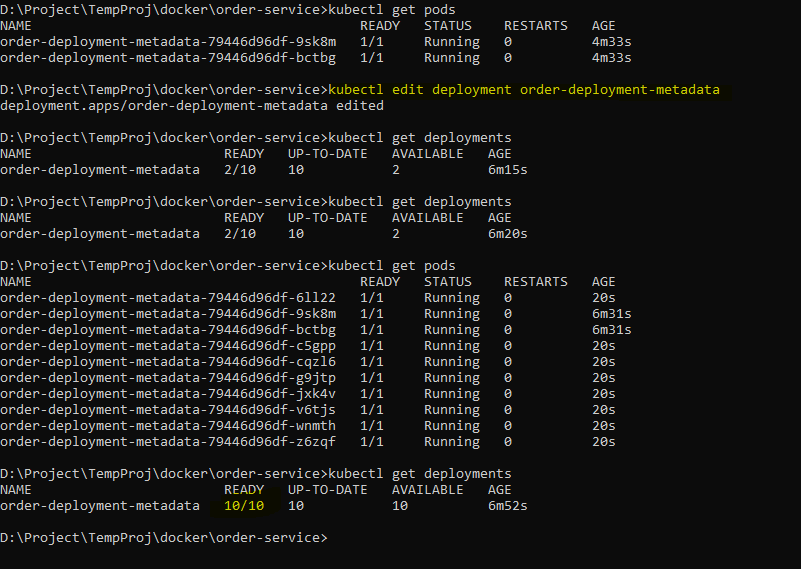
Lets suppose you want to scale your application, we can do that just by creating replicas. Kubernetes will automatically create load balancers and will handle our requests for us.
But you might think that we would have to delete the deployment and create a new one. Well no, we can edit deployments of the already running deployment using command: kubectl edit deplyment deployment-name
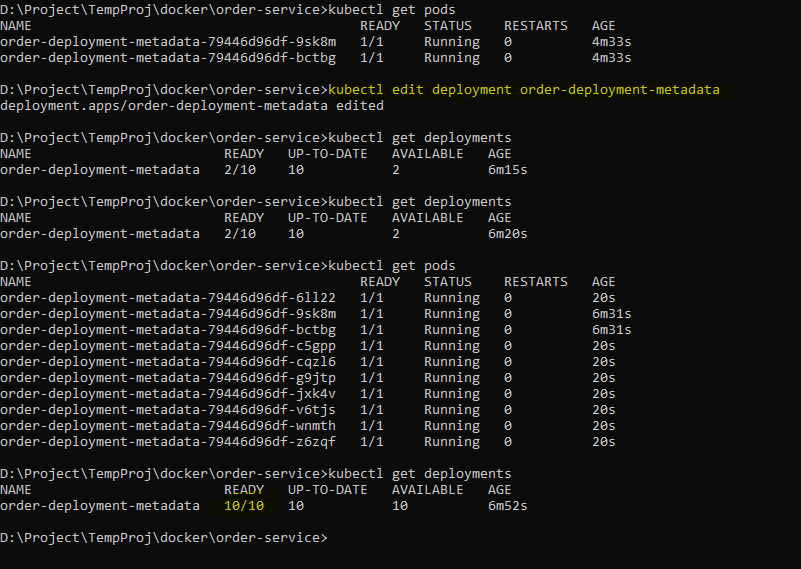
Create deployment, port forward and hit api:

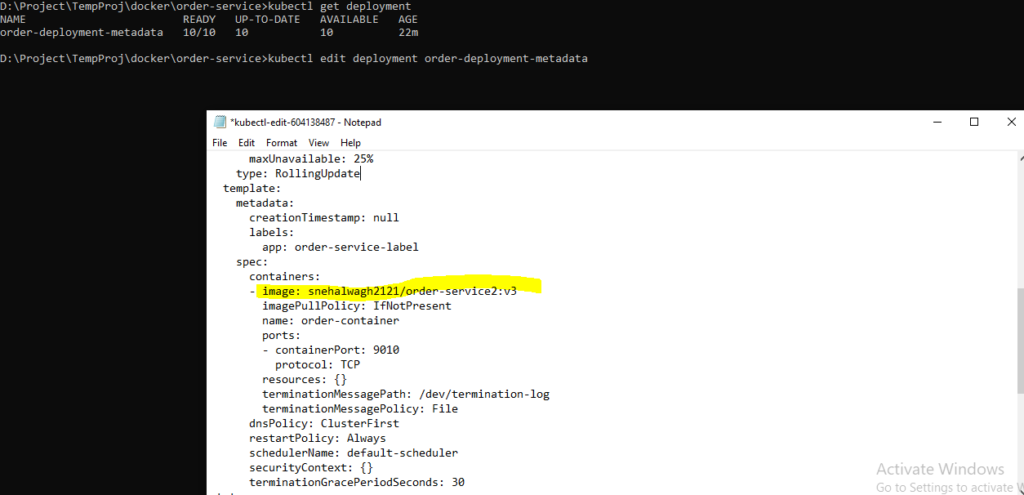
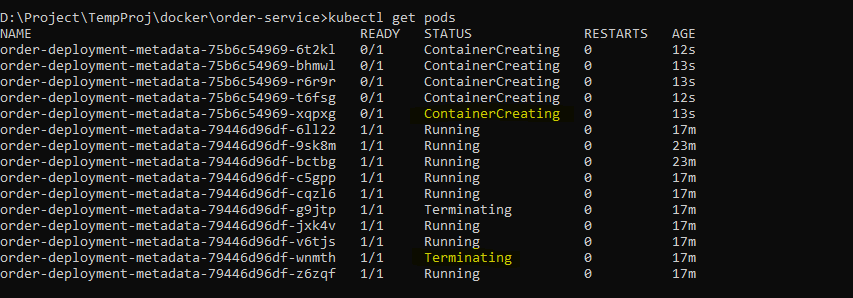
Isnt this cool. Well thats not enough, Suppose we have a code change, now to depoy previously we had to delete container and start a new one, now with kubernetes we just edit the deployment and kubernetes will automatically terminate the existing deployments and create the new ones.
I have modified the order endpoint response message and created a new image- snehalwagh2121/orderservice2:v3 :
Edit deployment and save file
Deployments Terminating And getting created:
Hit api and check message:
